Medal of Honor: Allied Assault Mods (MOHAA)
Discover and download community-created modifications to enhance your Medal of Honor: Allied Assault experience.
95 Mods Found
Foresight 16 Client
Foresight 1.6 Client-side. Only need the Client file? Download this one.
Foresight 16 Server Scanner
Upgrade from version 1.5. Only need the Server-side file? Download this one.
Foresight 15
Foresight Anti-Cheat is an all-in-one tool for all your administration needs. Every function of Foresight has been thought out and tailored for the easiest and best solution for administering your Medal Of Honor Server(s). From allowing custom maps and mods on ANY client to a user-friendly interface, Foresight will be the ultimate tool for controlling your gaming experience. Tested and works on Moh:AA, Moh:SH and Moh:BT. The main reason I developed this utility was the lack of decent docs, poor support and inadequate features in the current anti-cheat/admin tools. From the start I noticed that the current anti-cheat tools available were extremely limiting and hindering the expansion of the Medal of Honor series, by way of requiring ‘verified’ mods and maps. This in my opinion is not friendly to the community and mod/map makers. By limiting the mods and maps that people use on any given server you effectively stop any growth of the community based on your own standards. Foresight is here to change that. Foresight Anti-Cheat is an all-in-one tool for all your administration needs. Every function of Foresight has been thought out and tailored for the easiest and best solution for administering your Medal Of Honor Servers. From allowing custom maps and mods on ANY client to a user-friendly interface, Foresight will be the ultimate tool for controlling your gaming experience. I have always believed you do not need to ‘limit’ the mods and maps on the client-side to detect dishonest players. With the proper detection routines I have developed, Foresight will be able to detect ALL illegal cheats and hacks that the seedy players seem to find on the net, even cheats that have not been created yet. I hope you enjoy Foresight as much as I have enjoyed developing it.
Sfx Battlezone Creator
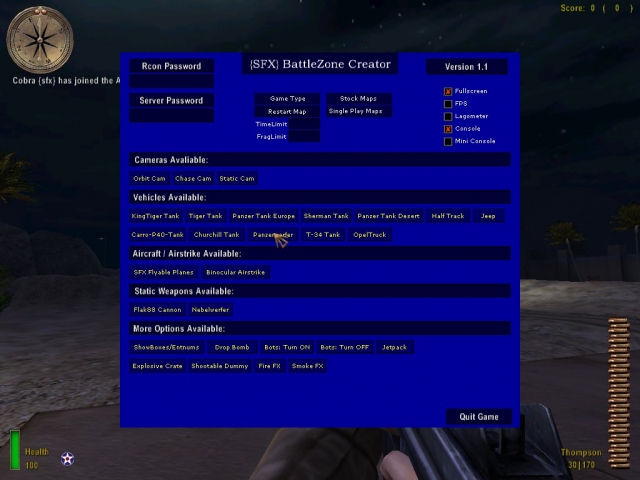
*** SFX BattleZone Creator *** *** by Cobra {sfx} *** *** Some useful and Fun Scripts to play with while you mod *** :) Well originally it was just for us modders to have some fun with while you mod and have some extra useful stuff, yeh it could go Multiplayer, could be issues there tho. Its much better with your URC Menu tho and a lot easier to use, good {sfx} team effort mate ;) Hope peeps find it useful or amusing and fun :) Some quick instructions ... put in main, load Moh, load a Single Player or TDM/OBJ map and ingame press F1 to access the menu. Would be interesting to see your comments on this :) I guess some are wondering why its called BattleZone Creator ... when you spawn any vehicles it will print onscreen the coords where it places them ... which will be added to your Qconsole log ... you could copy and paste the coords into your own map script then if your happy with where you placed a tank in your map and wanted a static model added based on your placement of the one in BattleZone Creator. (As an example). You can type logfile 1 to record the information to your Qconsole log if it isnt already set to 1 and then spawn a tank and retrieve the info from the log, here is the info from the log for the Panzer Tank Europe - i spawned one in Mohdm4 ... [Press USE and LET GO to Position the Laser.] [Panzer Tank Europe] [Targetname]: Panzer-Tank-E_#8264 [Type]: = models/vehicles/panzer_tank_europe.tik [Turret]: = models/vehicles/panzer_cannon_europe.tik [Destroyed Model]: = models/vehicles/panzer_iv_eud.tik [Health]: = 1000.000 [MaxSpeed]: = 320 [Target]: = (No Collision Targetted) [Origin]: = (42.220196, 1945.709351, 238.625000) You would just need to add the angle you want it to face. [b][u]Readme File Info[/u][/b] OrbitCam = This gives you an Orbiting Cam with music for 15 seconds - auto switches off. ChaseCam = This gives you a Chase Cam for 15 seconds - change perspective with your mouse - auto switches off. StaticCam = This gives you a Static Cam for 15 seconds - auto switches off. Tank 1 = KingTiger Tank. Tank 2 = Tiger Tank. Tank 3 = Panzer Tank Europe. Tank 4 = Sherman Tank. Tank 5 = Panzer Tank Desert. Tank 6 = Carro-P40-Tank. Tank 7 = Churchill Tank (issues with it firing correctly). Tank 8 = Panzerwerfer. Tank 9 = T-34 Tank. Driveable HalfTrack Winter Driveable Opel Truck Driveable Jeep Destroyed Vehicles are removed automatically on a timer to save on FPS :) You can Destroy them with the Admin Bomb if needed. SFX Planes = This spawns the SFX Flyable Planes Trigger and you start flying. Jetpack = Gives you 30 seconds of Low Gravity. Fire fx = Spawns some Fire. Smoke fx = Spawns some Smoke.// Shader/image issue ShowBBoxes/Entnums = runs for 30 seconds. Shootable Dummy = Spawns a Target Dummy you can shoot Explosive Crate - Toms BoomCrates Drop Bomb = spawns an admin bomb above you which drops - good fun dropping on Bots - can also use in spectate. ;) Bots ON - Adds JVs Bots Bots OFF - removes them Bot Info: Bots use script_origins targetnamed $alliesspawn and $axisspawn as their spawn points ... if you already have $alliesspawn and $axisspawn script_origins in your map type morebots 1 in console to add more Bots ingame. You can add more spawnpoints via script in your map script before prespawn. If your playing in a Single Player map the Bots will automatically use the path_nodes ... just add some $alliesspawn and $axisspawn script_origins. In MP they wont move very far as they have no pathnodes unless you add some via script. Cobs www.Mods-R-us.net Update - The Console typing is superceded by the Pacrac {sfx} URC Menu - Just press F1 ingame :) The Menu works in ALL stock maps and ALL Single Player Maps (included), just put the PK3 in your MohAA/main folder. Scripting by Cobra {sfx} URC Menu by Pacrac {sfx} Model Conversions by Cobra {sfx + Gold {sfx} This is a WIP - more to add yet :)
Bsp Stripper
usage: BSPstripper.exe example: BSPstripper.exe t1m3 t1m3stripped It will add the ".bsp" for you. HOW TO USE??? This is a command line application. THe easiest way is to open start-run.type "cmd" and open up command prompt. From here type cd (path to BSPstripper folder). for example. place bspstripper in c:\. Then open cmd.exe and type "cd c:\" then to run bspstripper just type "BSPstripper.exe " Removes currently: info_null ProjectileGenerator addon_playerweapon item_health trigger_once addon_ai item_ammobox info_pathnode ai_ trigger_hurt trigger_save info_aispawnpoint trigger_nodamage Also auto hexes the version number to 19 to load in MOHAA.
Scr File Opening Changer Win 8
This tool will easily change the default program to open .scr files within Win 8. More information about this tool can be found at the following links: http://www.tewoshien.com/cache/Open a .scr file with a text editor of your own choice.html http://www.tewoshien.com/cache/Update for OpenSCR_with.exe.html
Ez Modder Updated
>>>>>>>>>>>>>>>>>>>>>>>>>> INDEX >>>>> INSTALLATION AND UN-INSTALLATION INSTRUCTIONS >>>>>>>>>>>>>>>>>>>>>>>> MOD DATA >>>>>>>>>>>>>>>>>>>>> HISTORY OF MOD >>>>>>>>>> OTHER STUFF YOU NEED TO TO KNOW local.fix1 = spawn script_model model models/static/indycrate.tik origin ( -393.812 188.573 -143.921 ) angle ( 340.329 ) local.fix1 = spawn script_model model models/static/indycrate.tik origin ( 193.781 202.211 248.129 ) angle ( 179.044 ) local.fix1 = spawn script_model model models/static/indycrate.tik origin ( 82.942 204.061 248.129 ) angle ( 179.044 ) local.fix1 = spawn script_model model models/static/indycrate.tik origin ( -46.019 206.212 248.129 ) angle ( 179.044 ) local.fix1 = spawn script_model model models/static/indycrate.tik origin ( -160.562 208.123 248.129 ) angle ( 179.044 ) local.fix1 = spawn script_model model models/static/indycrate.tik origin ( -254.584 210.621 248.129 ) angle ( 178.478 ) local.fix1 = spawn script_model model models/static/indycrate.tik origin ( -340.846 212.912 248.129 ) angle ( 178.478 ) local.fix1 = spawn script_model model models/static/indycrate.tik origin ( -429.527 215.268 248.129 ) angle ( 178.478 ) local.fix1 = spawn script_model model models/static/indycrate.tik origin ( -521.838 217.720 248.129 ) angle ( 178.478 ) local.fix1 = spawn script_model model models/static/indycrate.tik origin ( -619.515 220.314 248.129 ) angle ( 178.478 ) local.fix1 = spawn script_model model models/static/indycrate.tik origin ( -682.666 221.992 248.129 ) angle ( 178.478 ) local.fix1 = spawn script_model model models/static/indycrate.tik origin ( -755.143 223.917 248.129 ) angle ( 178.478 ) // >>>>>>>>>>>>>>> KNOWN ERRORS IN VERSION 1.1 >>>>>>>>>>>>>>>>> REPORTING AN ERROR <<<<<<<<<<<<<<<<<<<<<<<< - To report errors in this mod (something I would like a lot), make a screenshot by pressing F12 and send it to me with a description of the error, mmecreaper@hotmail.com
Huddraw Helper
Readme & info:: Wonderfully helpful script for easy setup of huddraws, whether it's text or shader. Very simple to use, uses the same cvars for everything, you just add the line number to the end of the cvar Ex: 'font 9' will change line's 1 font to choice 9, while 'font2 9' will do the same thing to line 2, etc etc. The script auto loads the first line, and auto uses index 200. EVERYTHING can be changed by cvar, literally EVERYTHING. Just like the Fog Maker, place it in your main or extract as you wish, and in your map script exec global/hudhelp.scr ===================================================== Gotcha's Huddraw Helper script ===================================================== Cvars: 1.) help me <- Type this in console for help 2.) f list <- Type this in console for font list 3.) c list <- Type this in console for a color list 4.) line# "x" - on/off Use this to turn on a new line, line 1 is always on, so 'line2 on' turns on line2, all the way up to line5. To edit these new lines, 2-5, you must add the line # to your cvar. Ex: changing the left-right position of line 2 with the 'lr' cvar would be 'lr2 -200' to move to -200. Line 3 would be 'lr3 -200' and so on, simple eh? 5.) vs "x" - Virtual size, default 1 6.) hor "x" - Horizontal position, left/center/right, default right 7.) ver "x" - Vertical position, top/center/bottom, default top 8.) ud "x" - Move line up and down, subtract to move line up, add to move line down, min = 0, max = 470 (depending on font size) default = line 1 100, line 2 110, line 3 120, line 4 130, line 5 140 9.) lr "x" - Move line left and right, bigger negative number moves left, smaller moves right. Max depends on font size/text length, for default text min = -640, max = -135, default -150 10.) w "x" - Set the width, default 100 11.) h "x" - Set the hieght, default 100 12.) alpha "x" - Set the alpha, default 1.0 13.) text "x" - Set your text to display, default ******DEFAULT****** 14.) font "x" - Used with f list to set the font you want, default 11 15.) color "x" - Text color, only supports 8 premade colors, black, white, purple, yellow, cyan, blue, green, and red 16.) shader "x" - Used to reference in-game shaders found in texture folders Usage: 'shader textures/sprites/moon1' Setting 'shader "off"' will turn the shader off and go back to text. 17.) idx 'x' - Added last minute for convienence, this allows setting the index numbers, incase you already use lines 200-204, as with all the other commands add the line # to it to change other lines.

Huddraw_3d Utility
I've made this scripting utility for people who want to show a point relative to an origin/entity on-screen. This is also useful on making objective points. It only works with the reborn patch. ============================================ How to install (you might know it already) : put huddraw_3d.pk3 in your mohaa installation/main. ============================================ Here is the documentation on how it works : ============================================================================================================================================================================= /* * global/huddraw_3d.scr::worldtoscreen : convert a vector (origin) to a screen rectangle * a player must be specified when calling it (like local.player thread global/huddraw_3d.scr::worldtoscreen) * parameters : * local.origin : the vector to convert to a screen rectangle * result : * return an array : [0] is the screenX, [1] is the screenY and [2] specify whether if the origin can be shown or not from the player's view * example : * local.rect = $player thread global/huddraw_3d.scr::worldtoscreen ( 0 0 0 ) * local.sizeX = local.rect[0] * local.sizeY = local.rect[1] * local.shown = local.rect[2] \* ============================================================================================================================================================================= /* * global/huddraw_3d.scr::add3dpoint : show a 3D icon in-game for a player * a player must be specified when calling it (like local.player thread global/huddraw_3d.scr::add3dpoint) * parameters : * local.id : identifier of the huddraw element * local.origin : point origin. If local.entity is specified local.origin will be the vector offset for the point from the specified entity * local.string : like the (not working) print3d, it show a string in this location (but is forced to ignore the distance) * local.font [OPTIONAL] : Font to use if local.string is specified. This parameter will be ignored if local.string is not specified. The default font is "facfont-20". * local.shader : shader to show at the origin * local.ignoredistance : if set to 1, the shader will not be auto-sized from the player relative to the point's and local.sizeX and local.sizeY must be specified * local.sizeX : width size of the shader (default 32) * local.sizeY : height size of the shader (default 32) * local.refreshdelay : a number that specify how much to wait before refreshing. Setting "frame" will refresh each server frame. (default "frame") * local.entity [OPTIONAL] : entity to follow. If this parameter is specified, local.origin will be the vector offset for the point from the specified entity * remarks : * local.string and local.shader mustn't be specified both * local.sizeX and local.sizeY can be specified only if local.ignoredistance isn't set to 0 * example: * $player thread global/huddraw_3d.scr::add3dpoint 200 ( 0 0 0 ) NIL "textures/hud/allies.tga" 1 32 32 "frame" * $player thread global/huddraw_3d.scr::add3dpoint 180 ( 0 0 0 ) "ENTITY#1" NIL 0 NIL NIL "frame" $entity_1 \* ============================================================================================================================================================================= /* * change3dpoint_X : change a 3D point property for a player * * available functions : * * change3dpoint_followent -> params : ( Integer ID, Entity entity ) * change3dpoint_font -> params : ( Integer ID, String font ) * change3dpoint_ignoredistance -> params : ( Integer ID, Boolean ignore_distance ) * change3dpoint_origin -> params : ( Integer ID, Vector origin ) * change3dpoint_refreshdelay -> params : ( Integer ID, Integer refreshdelay ) * change3dpoint_shader -> params : ( Integer ID, String shader ) * change3dpoint_size -> params : ( Integer ID, Integer sizeX, Integer sizeY ) * change3dpoint_string -> params : ( Integer ID, String string ) * * See add3dpoint documentation for more informations on what these functions can do * * returns 1 on success, 0 otherwise \* ============================================================================================================================================================================= /* * change3dpoint_followent * see add3dpoint documentation for more * parameters : * local.id : identifier of the huddraw element * local.entity : entity to follow. If local.entity is NULL/NIL, then it will make the point stop following the entity * example : * $player thread global/huddraw_3d.scr::change3dpoint_followent 180 $entity_2 * $player thread global/huddraw_3d.scr::change3dpoint_followent 180 NIL \* ============================================================================================================================================================================= /* * remove3dpoint : remove a 3D point from a player * parameters : * local.id : 3D point id to remove from the player \*/
Date and Time API
I wrote a date and time API a long time ago. I've spent the last four hours rewriting it. The implementation is based on that of the DateTime struct in .NET Download and unrar the script and place it in your main/reborn/ folder. If it does not exist, create it. You could also package it in a pk3 as long as the path remains the same. In your script, you have to initialize the API before you can use it: waitexec reborn/datetime.scr; At this point, you can access the API through level.DateTime. local.boolean = waitthread level.DateTime.IsLeapYear local.year; Determines whether the specified year, or the current year if none specified, is a leap year. local.days= waitthread level.DateTime.GetDaysInMonth local.month local.year; Determines how many days the specified month has in the specified year, or the current year if none specified. local.year = waitthread level.DateTime.GetYear; Gets the current year as an integer [1, 9999]. local.month = waitthread level.DateTime.GetMonth; Gets the current month as an integer [1, 12]. local.day = waitthread level.DateTime.GetDay; Gets the current day of the month as an integer [1, 31] local.weekday = waitthread level.DateTime.GetDayOfWeek; Gets the current day of the week as an integer [0, 6] where Sunday is 0, Monday is 1 etc... local.day = waitthread level.DateTime.GetDayOfYear; Gets the current day of the year as an integer [1, 366] local.hour = waitthread level.DateTime.GetHour; Gets the current hour of the current day as an integer [0, 23] local.minute = waitthread level.DateTime.GetMinute; Gets the current minute of the current hour as an integer [0, 59] local.second = waitthread level.DateTime.GetSecond; Gets the current second of the current minute as an integer [0, 59] local.offset = waitthread level.DateTime.GetTimeZone; Gets the local time zone offset [-12, 14] local.days = waitthread level.DateTime.GetDayNames; Gets a zero-indexed array of names of each week day where index 0 is Sunday, index 1 is Monday etc... The value returned by a call to GetDayOfWeek() corresponds to the index in this array. local.months = waitthread level.DateTime.GetMonthNames; Gets a one-indexed array of names of each month where index 1 is January, index 2 is February etc... The value returned by a call to GetMonth() corresponds to the index in this array. local.dateTime = waitthread level.DateTime.Create local.second local.minute local.hour local.day local.month local.year local.timeZoneOffset; Creates a new DateTime instance of an instant in time. If no time zone offset is specified, the offset of the local time zone will be used. local.dateTime = waitthread level.DateTime.Now; Gets a DateTime object that is set to the current date and time on this computer, expressed as the local time. local.dateTime = waitthread level.DateTime.UtcNow; Gets a DateTime object that is set to the current date and time on this computer, expressed as the Coordinated Universal Time (UTC+0). local.dateTime2 = waitthread level.DateTime.ToTimeZone local.dateTime local.timeZoneOffset; Gets a DateTime object representing the value of the specified DateTime object in the specified time zone. local.result = waitthread level.DateTime.Compare local.dateTime local.dateTime2; Compares two DateTime objects. This function returns 1 if the first is more recent than the second, -1 if the second is more recent or 0 if they are equal. The DateTime instance is simply a Listener object that represents an instant in time, expressed as a date and a time of day. The actual date and time are stored as a number of seconds in a day and a number of days since year 0001 AD. This makes implementating operations such as addition and subtraction way simpler. Only counting the seconds would have been even better but the integer value would overflow. This mean that the object has no public properties for the year, month etc... . Luckily, the interface of the object does provide this functionality: local.dateTime = local.dateTime waitthread local.dateTime.AddYears local.years; Gets a new DateTime instance that adds the specified number of years to the value of this instance. local.dateTime = local.dateTime waitthread local.dateTime.AddMonths local.months; Gets a new DateTime instance that adds the specified number of months to the value of this instance. local.dateTime = local.dateTime waitthread local.dateTime.AddDays local.days; Gets a new DateTime instance that adds the specified number of days to the value of this instance. local.dateTime = local.dateTime waitthread local.dateTime.AddHours local.hours; Gets a new DateTime instance that adds the specified number of hours to the value of this instance. local.dateTime = local.dateTime waitthread local.dateTime.AddMinutes local.minutes; Gets a new DateTime instance that adds the specified number of minutes to the value of this instance. local.dateTime = local.dateTime waitthread local.dateTime.AddSeconds local.seconds; Gets a new DateTime instance that adds the specified number of seconds to the value of this instance. local.result = local.dateTime waitthread local.dateTime.CompareTo local.dateTime2; Compares two DateTime objects. This function returns 1 if the first is more recent than the second, -1 if the second is more recent or 0 if they are equal. local.year = local.dateTime waitthread local.dateTime.GetYear; Gets the year component of the date represented by this instance as an integer [1, 9999]. local.month = local.dateTime waitthread local.dateTime.GetMonth; Gets the month component of the date represented by this instance as an integer [1, 12]. local.day = local.dateTime waitthread local.dateTime.GetDay; Gets the day of the month represented by this instance as an integer [1, 31] local.weekday = local.dateTime waitthread local.dateTime.GetDayOfWeek; Gets the day of the week represented by this instance as an integer [0, 6] where Sunday is 0, Monday is 1 etc... local.day = local.dateTime waitthread local.dateTime.GetDayOfYear; Gets the day of the year represented by this instance as an integer [1, 366] local.hour = local.dateTime waitthread local.dateTime.GetHour; Gets the hour component of the date represented by this instance as an integer [0, 23] local.minute = local.dateTime waitthread local.dateTime.GetMinute; Gets the minute component of the date represented by this instance as an integer [0, 59] local.second = local.dateTime waitthread local.dateTime.GetSecond; Gets the hour component of the date represented by this instance as an integer [0, 59] local.offset = local.dateTime waitthread local.dateTime.GetTimeZone; Gets the time zone offset of the date represented by this instance as an integer [-12, 14] local.localTime = local.dateTime waitthread local.dateTime.ToLocalTime; Converts the value of this DateTime object to local time. local.utcTime = local.dateTime waitthread local.dateTime.ToUniversalTime; Converts the value of this DateTime object to Coordinated Universal Time (UTC+0). println(local.dateTime waitthread local.dateTime.ToTimeString); Gets the time component and time zone offset of the date represented by this instance as a string. println(local.dateTime waitthread local.dateTime.ToDateString); Gets the date component of the date represented by this instance as a string. println(local.dateTime waitthread local.dateTime.ToString); Gets the date represented by this instance as a string. Finally, if you're done with a DateTime object, you will have to dispose it like so. local.dateTime waitthread local.dateTime.Dispose; Beware that exceptions will be thrown if invalid input is given to any function. Currently two exceptions are thrown, ArgumentNullException and InvalidArgumentException. Handle them as follows: try { local.dateTime = waitthread level.DateTime.create 0 0 0 18 5 2015; } catch { InvalidArgumentException: println("Could not create DateTime object."); } try { local.year = local.dateTime waitthread local.dateTime.GetYear; } catch { ArgumentNullException: println("DateTime object is null."); }

MOHAA Picture Pack
This pack contains all sorts of pictures that are in some way related to MOHAA/SH/BT. They have been found all over the net and can be used for various reasons (to create new pictures, decorate websites, decorate desktop, use in mods, teamspeak icons etc.) The pack contains all types of pictures: Logos, icons, banners, headers, wallpapers etc. The pictures included range from various things: game, software, mods, websites/communities, useful tabs and various other things. A total of 469 pictures are included within the package.
Syanide
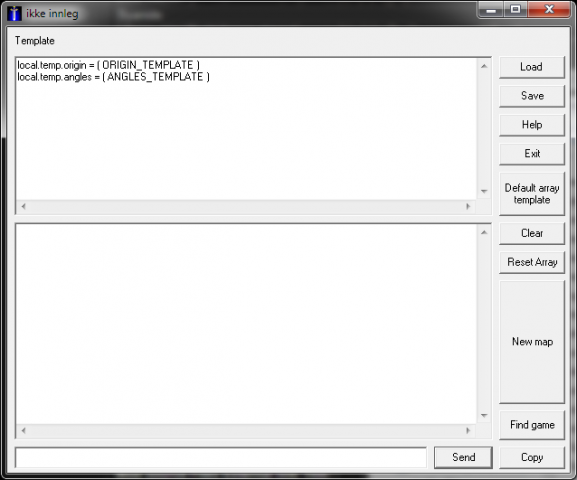
Open when MOHAA/MOHSH/MOHBT is open and bind a key to coord ingame and then run around and press your bound key and the coords will appear in the autocoord tool!

Admin++ for MOHAA 1.0
This is only for Linux! more info about this is on ModTheater on this link: http://modtheater.com/threads/mohaa-adminmod.22844/

MOH Shield
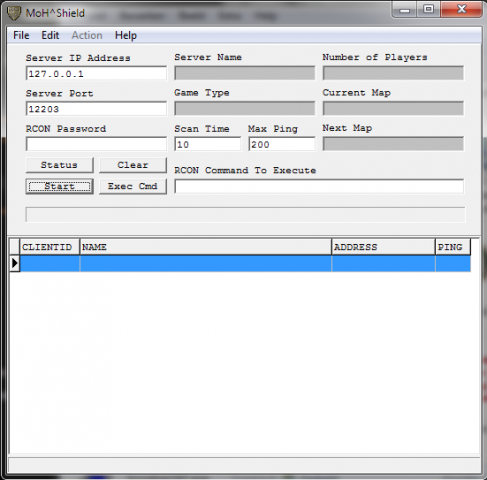
System Requirements CPU P3 700MHz Memory 128MB Disk Space 20MB Operating Systems Windows 2000, XP, vista, 7, 8, 2008, 2012 (Windows 98 may work, but may require some additional libraries.) Compatible Games MoH:AA, MoH:SH, MoH:BT and MoH:PA (only tested with MoH:BT and MoH:PA)
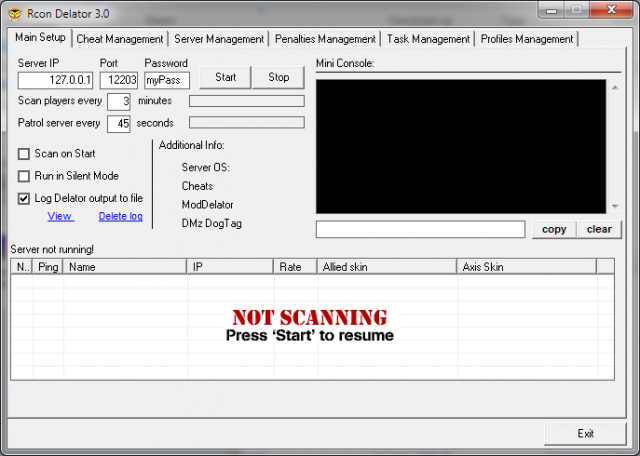
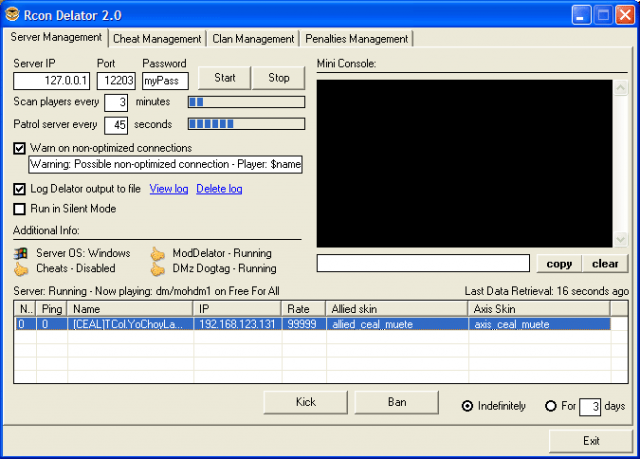

MAM 1.2
ARCHIVE INSTALL ================================================================== Extract the files in this Zip archive under the following folder: C:\Program Files\EA GAMES\MOHAA\main (and/or mainta for Spearhead) Note: if you've installed MoH:AA in a different folder, you will still need to place the file under that folder's ...\main(ta) Update MoH_AdminMod.cfg as appropriate and add it to your server's startup config. The config must be exec'd BEFORE the first map is started. FOR ADDITIONAL INFORMATION: http://www.mohadmin.com/nuke/modules.php?name=Forums&file=viewforum&f=16 Enjoy. RELEASE HISTORY ================================================================== 1.2 - Removed MAM_Security (and related config entries) from the base package (MAM_Security will now be distributed as a separate package) - Moved several "security" commands from MAM_DefaultCmds to MAM_Security - Added "swap_teams" command 1.1 - Fixed restart problem running TOW maps; utilize a more reliable startup method to kick-off the mod. - Made a few fixes to the Command Proc module - Added "unregister" command, to remove an already registered command - Added an "emergency" command, which bypasses the normal queueing process. Instead of using "command ...", use "mam ..." and it will be processed almost immediately. 1.0a - Fix a server crasher in the MAM_Security add-on mod - Added comment information to helper utility functions 1.0 - First release

Ck Autokick
This is one of the first Autokick programs for MOHAA. The missing error fix (for Win Vista/7 etc.) is also included in this file!

MOHAA Counter Intelligence
An autokick tool for MOHAA. An old anti-cheat system is also added in this software. The Tool might not work with Win7/8. A Remote Access tool is also included within the zip file.
Medal of Honor: Allied Assault Mods (MOHAA) — Complete Community Archive
Welcome to the premier repository for Medal of Honor: Allied Assault mods. Since the game's groundbreaking release in 2002 by 2015, Inc. and EA, MOHAA has inspired one of the longest-standing modding communities in first-person shooter history. MOH-DB preserves, categorizes, and serves over 1,600 verified community modifications, custom enhancements, and competitive utilities for Allied Assault, Spearhead, and Breakthrough.
Explore MOHAA Mod Categories
Player Skins & Uniforms
Over 700 historically accurate and creative player uniforms for Allied and Axis factions. Equip authentic U.S. Army Rangers, 101st and 82nd Airborne paratroopers, British Commandos, Soviet Red Army conscripts, Wehrmacht Heer infantry, Fallschirmjäger, and Waffen-SS camouflage patterns, as well as classic community clan skins.
Weapon Models & Reskins
Enhance your WWII arsenal with ultra-detailed weapon replacements and high-resolution textures. Popular downloads include authentic wood-finish Kar98k sniper rifles, realistic metallic sheen M1 Garand models with classic "ping" animation refinements, Thompson submachine guns, MP40s, BAR 1918 rifles, and custom iron-sight alignments.
Soundpacks & Realism Audio
Transform the sonic atmosphere of Allied Assault. Replace compressed 2002 Quake-engine sound effects with cinema-grade gunfire recordings, authentic distant artillery rumblings, terrifying Stuka dive-bomber sirens, supersonic bullet cracks, metal ricochets, and remastered German and American voice callouts.
HUDs, Menus & Crosshairs
Modernize the in-game interface for 1080p, 1440p, and 4K widescreen displays. Download minimalist competitive heads-up displays, custom dot and crosshair overlays, cleaner compass indicators, redesigned main menus, and unobtrusive health and ammunition counters favored by competitive league players.
Server Utilities & Admin Scripts
Run resilient, modern multiplayer game servers with essential server-side utilities. Includes automated map rotators, anti-cheat detection tools, voting scripts, custom match timers, ping balancers, and administrative rcon managers designed for dedicated servers running 24/7.
MOHAA Reborn 1.12 Community Patch
The gold standard community patch for modern MOHAA servers and clients. The Reborn 1.12 patch resolves legacy buffer overflows, fixes client query exploits, expands internal script limits for complex mods, and provides a built-in server browser to replace the defunct GameSpy master server.
How to Install MOHAA Mods: Quick Guide
Identify Your Target Directory
MOHAA stores all game assets in subfolders inside the root installation directory:
- MOHAA (Base):
.../MOHAA/main/ - Spearhead:
.../MOHAA/mainta/ - Breakthrough:
.../MOHAA/maintt/
Paste Without Extracting
Download the mod archive from MOH-DB. If it is zipped (.zip or .rar), extract the enclosed .pk3 file. Place this .pk3 directly into your game's /main/ folder.
How to Remove or Troubleshoot
To remove any mod, simply delete its .pk3 file from the /main/ folder. The game will immediately return to stock behavior without reinstalling.
Frequently Asked Questions about MOHAA Mods
To install MOHAA mods, copy the downloaded .pk3 file directly into your Medal of Honor Allied Assault installation folder under /main/ (or /mainta/ for Spearhead, and /maintt/ for Breakthrough). You do not need to unpack or extract the .pk3 archive—the game engine loads it automatically upon launch.