Medal of Honor: Allied Assault Mods (MOHAA)
Discover and download community-created modifications to enhance your Medal of Honor: Allied Assault experience.
1676 Mods Found
Next Map Message
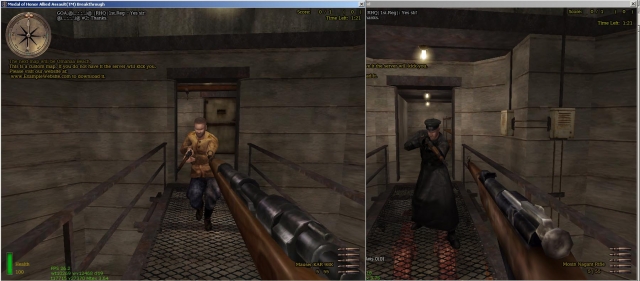
This mod will show what the next map will be, below the compass (on the left) for all players in the server. View the Readme below for all info on how to use it and modify it (readme also included within the zip file). /*******************************************************************************\ Readme.txt "Next Map is..." message script Readme by: @(...:.:...)@ / Hal Email: 1st.regiment [at] gmail [dot] com TMT member: http://www.modtheater.com/forum/member.php?u=5281 14/8/2005 ------------------------------------- If you have any questions or problems, post in this thread: http://www.modtheater.com/forum/showthread.php?p=219912#post219912 or email me at the address above. ------------------------------------- It is best to view this document WITHOUT word wrap on, otherwise it may become very hard to read and understand the vstr aliases. Also I have already put in line breaks to keep the width down, so it may look odd if you have word wrap. :S \*******************************************************************************/ Description: This script will display a message telling players what the next map in your rotation will be. It does this by extracting information from a few new cvars that are added to your servers .cfg file. See the 2 screenshots included in the zip. Instillation: This depends on your current server mod setup. If you have other mods which use DMprecache.scr, start at step 1. If you are SURE that you are not using any custom DMprecache.scr files, proceed to step 2. 1. - Combining DMprecache's I will write this description pretty much so that anyone can make this mod work. If you have any scripting experience, i'm sure you know what to do anyway. ;) Ok, first up get all of the CUSTOM pk3 files you have on your server. If you don't have it already, get Pakscape. You can download it from here: http://users.1st.net/kimberly/Tutorial/down.htm Open up the pk3 files one by one with pakscape. In pakscape, browse to the "global" folder (if there isn't a global folder, just close the pk3 and move on to the next). You are looking for a file called DMprecache.scr. If you find one, leave it's window open in pakscape, and finish looking through all of your servers custom pk3s. Hopefully there is only one DMprecache.scr. Copy it and paste it to a folder on your harddrive so that you can work on it. If there is more than one, put them all in the same folder. Rename them DMprecache2.scr, DMprecache3.scr etc. Open up as many windows of notepad or WordPad as you have dmprecache files. In notepad or WordPad, do file>open and select "all files" or "all documents" from the drop down menu below the folder browsing area. Browse to the folder you placed your dmprecache files in, and open each one in a different WordPad/notepad window. Now check through the files for any line which starts with "exec" then a path and filename. Eg: exec global/nameofscripthere.scr If you only have one dmprecache file, skip this bit. If you have more than one dmprecache, you need to combine the exec... lines into one file. Just copy all of the exec lines from all the dmprecache files, and paste them into one file. Delete any duplicate lines. (you don't want it to exec the file twice.) When you have combined them into one file, paste the following line into your dmprecache file with the other exec lines, or at the bottom if there are no others: exec global/maprotationmessage.hal Then file>save and close all of the WordPad/notepad windows. Paste your newly edited dmprecache back into any pk3's which contained one, and save the pk3s in pakscape (file>save). Upload any pk3's you changed, and zzz_Next-Map-Is-[no precache].pk3 2. - editing cfg's If you skipped part 1 because you don't have any edited dmprecache files, upload zzz_Next-Map-Is.pk3 to your server. Obtain a copy of the .cfg file your server starts from (normally server.cfg) If your vstr rotation is in another file, just get that file. Copy & paste it to a folder on your HDD to work on. Copy and paste this text into your .cfg file ABOVE your vstr rotation code. Copy the text between the star lines, but NOT the star lines themselves: ************************* From Here (but not this line) //_____________________________________________________________________________________________________________________________ //Map Rotation Messages cvar section // The download URL for any custom maps on the server. Usually your clan/group's website address, or could be some other website which hosts the custom map. set website "http://www.examplewebsite.com" //If the script should print a message about the download URL of custom maps to the console of clients with developer on. set printtoconsole "1" //The time delay between messages in seconds. Default and minimum is 20 seconds. //If it is not set, or set to less than 20, it will be reset to 20 seconds to prevent flooding. set mapmessage_waittime "60" //The delay from the start of the round, to the first message. For example, //if it is 20, the first next map message will appear 20 seconds after the "time left" timer //start's to count down. In Objective/round based matches, this is 20 seconds after each round starts. //For All other, gametypes, the timer starts when the server finishes loading the map (before clients have finished loading) //so take into account the time it takes a player to load the map on his pc. set startup_waittime "30" //set nextmapname & iscustom to "" to initiate them, so that the vstr rotation can use them. set nextmapname "" //DO NOT EDIT OR REMOVE THIS LINE set iscustom "" //DO NOT EDIT OR REMOVE THIS LINE //_____________________________________________________________________________________________________________________________ ************************* To here (but not this line) Edit the cvars to your liking. Now you just need to add the "nextmapname" and "iscustom" cvars to your vstr aliases. Eg - set x1 "nextmapname la_patrouille_2; iscustom 1; g_gametype 4; fraglimit 5; timelimit 0; roundlimit 6; map obj/objlol_v2_13; set nextmap vstr x2" set x2 "nextmapname vsuk_abbey_beta; iscustom 1; g_gametype 4; fraglimit 5; timelimit 0; roundlimit 5; map obj/obj_la_patrouille_2; set nextmap vstr x3" set x3 "nextmapname V2_Rocket_Facility; iscustom 0; g_gametype 4; fraglimit 5; timelimit 0; roundlimit 5; map obj/vsuk-abbeybeta; set nextmap vstr x4" set x4 "nextmapname St_Renan_Bridge; iscustom 1; g_gametype 4; fraglimit 5; timelimit 0; roundlimit 5; map obj/obj_team2; set nextmap vstr x5" set x5 "nextmapname The_Bridge; iscustom 0; g_gametype 4; fraglimit 5; timelimit 0; roundlimit 5; map obj/renan; set nextmap vstr x6" set x6 "nextmapname Neuville; iscustom 1; g_gametype 4; fraglimit 5; timelimit 0; roundlimit 5; map obj/obj_team4; set nextmap vstr x7" set x7 "nextmapname The_Hunt; iscustom 0; g_gametype 4; fraglimit 5; timelimit 0; roundlimit 5; map obj/obj_neuville; set nextmap vstr x8" set x8 "nextmapname St_Lo; iscustom 1; g_gametype 4; fraglimit 5; timelimit 0; roundlimit 5; map obj/obj_team1; set nextmap vstr x9" set x9 "nextmapname lol_v2_13; iscustom 1; g_gametype 4; fraglimit 5; timelimit 0; roundlimit 5; map obj/stlo; set nextmap vstr x1" The nextmapname is the name of the map on the next line. The iscustom is 1 if the map on the next line is a custom map. Otherwise it should be 0. Split words with a "_" (underscore) when setting names for the nextmapname cvar. The script will replace the underscores with blank spaces before it prints the messages in the game. Eg: nextmapname St_Renan_Bridge will print in the game as: St Renan Bridge Now just save the cfg, and upload it to your server. Restart the server. Remember, the messages only start after the round timer starts to count down, so in objective matches the round has to start before the messages will begin (eg. you need one person on each team). Uninstall: Delete the zzz_Next-Map-Is.pk3 or zzz_Next-Map-Is-[no precache].pk3 and if you like edit dmprecache to remove the exec line for this script. Enjoy :-) (sorry about the lengh :S )
Afi Menu Music
This is a main menu sound MoD that changes it to an AFI song (malleus maleficarum). To INSTALLL make sure you put the "mus_Maintheme" in your EA GAMES/MOHAA/MAIN/SOUNDS/MUSIC FOLDER. By: *={SS}=* PyroManiac |R|3s|

St Patricks Day Mod
This is a mod that was original designed to celebrate St. Patricks day, but ive enjoyed making and using it too much. This mod works for Spearhead & Breakthrough. AA untested. Things to look for: -US & Axis Smoke grenades been reskinned to guiness cans (Thankyou Sgt.Sultz for the Idea) (Texture compression needs to off!) -Irish scopes both allied and axis. -When pistol is drawn the line "I First Produced My Pistol" is played (The original not metallica) -Allied avatars changed to shamrocks -medipacks reskinned to guiness crates, when picked up "Beer beer beer tiddily beer" is played -Health meter changed Pint of guiness empties as life is taken (having trouble resizing :( -all weapons icons have been made to look very irish -In game cursor changed to irish flag -Crosshair(not irish crosshair but accurate) & friendlyfire crosshair changed(Im aware it says "Oirish" my friend spells it how it sounds). -Blood mod (body hit puff is green, ejecting blood is green, green shamrocks are left as bloodstains. Install Just Place the .pk3 in the MAINTT/MAINTA folder in the MOH Directory Uninstall Just Delete or Move the .pk3 from the MAINTT/MAINTA folder in the MOH Directory If anyone can think of a way to improve this mod as i am keen to expand this mod if anyone knows how to model and would like to contribute their work would be greatly appreciated. leese92@hotmail.com Sonic.XR54 leese92@hotmail.com p.s. I apologize if i may of offended anyone of Irish origin, it was originally intended to be private mod for me and my Irish friend (who btw loves this mod and gave me the majority of ideas) but ive spent too much time making and enjoying it so i think its time the public can enjoy this mod.
AA Battle Server
In short, what you get: 1. Complete modified weapons pak 2. All multiplayer DM boards are modded with a combo of bot vehicles, bot planes, and dogs See readme for more details.

Easygen
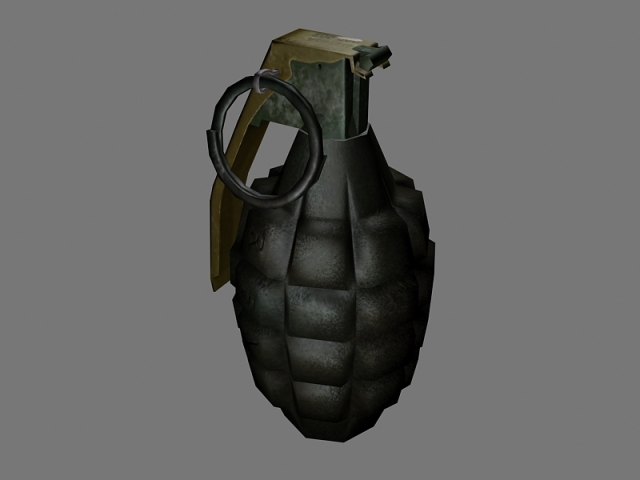
Software to help build terrains for a map. Tutorial is included in the package. -------------------------- EasyGen 1.2 03/03/2002 -------------------------- Author: Francesco Bancalà bancaf@libero.it http://digilander.iol.it/ilbanca/ +----------------+ 0. About EasyGen 1. Installation 2. Features 3. Knwon bugs 4. Credits 5. FAQ & Troubleshooting +------------------------+ 0. About EasyGen ---------------- EasyGen is free. With EasyGen you build up terrains and export them as Quake3 source map (including alphamap and metahsaders). Bitmap import/export is also supported but EasyGen can do all the job by itself. Supported games: - Quake3 - Return To Castle Wolfenstein - generally all games based on Q3 engine, who need a source map(.map), an alphamap(.pcx) and a metashader script(.shader) to compile a terrain entity. (if you want to to learn more about this process read the Official Terrain Manual written by Paul Jaquays contained in the latest GTK installations) 1. Installation --------------- Make sure to extract all files contained in the zip in the same folder. After you've extracted the zip, EasyGen folder should looks something like this: EasyGen\modifiers\*.* - modifiers EasyGen\save\sample.egn - sample terrain EasyGen\tutorial\*.* - tutorial stuff EasyGen\EasyGen.exe - executable EasyGen\btnexgenipl32.dll - a dll EasyGen\readme.txt - this readme.txt EasyGen will not run if 'btnexgenipl32.dll' is not in the same folder. Also EasyGen needs to know your work mod folder under root folder (ie baseq3\, missionpack\, main\ etc etc), you will be prompted to browse for that asa you start EasyGen. I repeat for the last time, you need to browse for a MOD folder, not for the root folder. 2. Features ----------- > Terrain shape manipulation through several modifiers (Hill,Cone etc etc). > Program your own modifiers with an easy asm like language. read 'custom_modifier.txt' to learn how to do that. > Direct exportsource map plus alphamap and metashader script. > Alphamap import/export. > Bitmap import/export. > Models (md3) are loaded automatically from //models/ folder PS: this version DOES NOT support loading from previous beta versions of EasyGen. If you want to load a terrain that you made with EasyGen0.8 or earlier, you must do it through a bitmap that you have exported with the past version. 3. Known Bugs ------------- - Resizing the width(x|y) of the grid when lock is OFFdoes not resize the alphamap. (altering divisions does it). - I don't know what could happen if you use textures of different sizes, if you don't want get in troubles use textures of all the same sizes (all 256x256 or all 128x128, ...) - I think you'll find other bugs, please let me know :) 4. Credits ---------- Tnx to: .idSoftware for the game .NeHe for his OpenGL tutorials - http://nehe.gamedev.net/ .http://www.codeguru.com/ for his kick ass programming forum .guys of http://www.quake3world.com/ level editing forum .Binary Technologies for his powerfull image library Binary Technologies http://www.binary-technologies.de info@binary-technologies.de .KitCarson for breaking my balls to implement texture support :) Special thanks to: .RKone: for helping me solving an export bug. .^Lord Squart^: for some useful suggestions. .Hubas: he had to face an advanced version of the export bug and still give me useful suggestions He also wrote the tutorial .djbob: for telling me the way to fix the texture render bug .snickelfritz: for his alphamap tutorials .me 5. FAQ & Troubleshooting ------------------- Q: What the hell is this gray and white grid? A: you can get the damned grid for several reasons: 1. the width of each division along X and/or Y axis is not a power of 2. Use 128 or 192 or 256(most used). You set these values from the Grid TAB, 'Div.Width.', enter two values (one along X and other along Y, generally the same), then press Apply on the right. 2. You have played with the keys of the terrain entity from GTK, or renamed and/or edited the alphamap and shader files generated by EasyGen. To do this you ust know exactly what are you doing because there are linked references by names in that stuff. (filename and names inside text files) 3. Corrupted shaders? Try moving out custom pk3 from you mod folder. Q: Why do the textures look fine from EasyGen and from Quake3 are all shifted along a direction? A: This seems to be a bug of some q3map versions. To fix this edit your alphamap(PCX) exported by EasyGen with a 2D graphic program such as PaintShopPro and remove the first vertical line of pixels. If the original alphamap was 33x33 the final one must 32x33. Sounds strange but it works. Q: Mmm what are the various xxx_vxinfo.txt files under my EasyGen directory ? A: mapname_vxinfo.txt is generated when you insert the terrain into an existing map. When you insert the terrain EasyGen simply append the terrain entity to the end of your map. Vertexremapshader information is not inserted because it must be inserted into worldspawn entity that somewhere inside the map file, and I had no time to program a complete map parser. So you must insert it manually with a text editor, inside the worldspawn. This is a critical operation for someone, I know. Back up first. 6. Final Stuff ------------- Programming is an hobby for me, so I take no responsability if your pc blows up while running EasyGen ! Feedback, bug report, suggestions, are appreciated :P If you'd like to have EasyGen as a plugin for GTK/Q3R, write me and I'll think about it, btw I think it works better standalone. Quake3Arena and RTCW are registered trademark of 'id Software' ! > http://www.quake3arena.com > http://www.idsoftware.com
Pakradar
PakRadar, the autodownload tool (custom maps etc.) for servers and clients. There is an Installer included but also a NoInstaller (in which you have to install everything manually). You can choose which one you want yourself.


GS Protector v4
Gameserver Protector: ********Attention: Version 4.0 isn't working, a new version is not in the making but is available on sourceforge https://sourceforge.net/projects/gsprotector/ if you are able to fix issues please update here ********* GsProtector is a firewall working on the application level for gameservers. It filters between good and bad traffic and passes only the good traffic to the gameservers. Clients that send frequently bad traffic are automatically IP banned. If a server is under attack legit players will still be able to play. Beside this core functionality it also provides admin capabilities such as IP and IP range banning and subadmin system accessible through the rcon interface of the gameserver. Other feature are detailed logs about traffic and connections, QoS and traffic shaping and various features to protect the gameserver from remote attacs. Features: Protection against query flood attacs (eg. getstatus flood) Protection against rcon flooding Protection against remote crashing Protection against attacs with spoofed IP's Protection against attacs with bogus data Autoban System for Attackers Anti Lag IP Banning IP Range Banning Firewall Banning Immunelist Rconlocker: Prevents changing of rcon password via console Bad Rcon blocker, rejects rcon requests with wrong rcon password Whitelists for Queries, Rcon, Joining Shield Mode. Only registered players can join or administer the server. (Players register prior with the register password via. rcon) Detailed Information about Packets and Traffic Detailed Logs. Rcon activity is logged with timestamp and IP. Trafficshaping and QoS Easy to use Sub-Admin System, Sub Admins get their own rcon password so they can use any other rcon tool e.g. scapp-host, hlsw, ingame menu or ingame console - you define which commands they are allowed to use It is possible to use single ban and immune lists for multiple servers (SharedGspFolder) ( Fully configurable via config file or rcon, features can be toggled on/off High Performant, as effectively as a firewall but especially tailored for game servers Works independently from other patches or tools If your server is being attacked you will still be able to join and play Comes shipped with a comfortable and easy to use Editor. The Editor allows easy management of settings and banlists. Please check the Documentation here: http://www.scapp.net/forum/index.php/topic,127.0.html about details. Important: Installation: Run the .msi GsProtector setup file. This will install the GsProtector Editor on your computer. With the editor you can install and manage your GsProtector installation on your server. The installation will create folders to manage and held local copies of GsP settings and log files in your personal data folder. Search for folder "scapp" if you need to locate. You need a ftp connection to your gameserver. Download and installation will most probably issue warnings "unknown publisher" coming from your browser or Windows OS. The software is developed with no intention to harm your computer in any way, you may want to grab the source-code, check and compile yourself. In any case you should only download and install GsP from this site or the sourceforge site. Deinstallation: Use the remove function in the editor if you want to remove GsProtector from the server. Or alternativly remove manually the GsProtector folder and then the files: myproxocket.dll, ws2_32.dll, wsock32.dll. Use the "uninstall a program" function of your windows to uninstall the GsProtector Editor. Please note - The GsProtector is only for Windows systems. - This version of GsProtector (4.0) is in an early beta stage. - This version of GsProtector (4.0) is not compatible to previous version (except for banlists) - Full features only available with mohaa/sh/bt games Known Bugs early beta stage, contains bugs for sure. Open Source GsProtector is open source 8) licenced with GpL v.2 licence, source code is hosted on sourceforge.net: https://sourceforge.net/projects/gsprotector/ Sourcecode is located in the source folder on sourceforge.net.
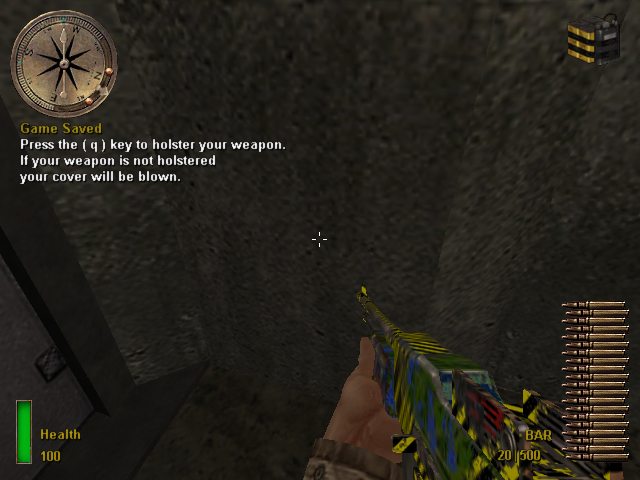
Skittastical Bar
Unzip the file and place the pk3 in your main folder Thanks to Armdude101 for the skinning tutorial

Black Silver M24
LZs Blacksilver M24 this replaces the sp 03 this skins textures were made by LZ the model was taken from cn ------------ install in mohaas or mohaab depending on game ------------------- by LZ [|¦Cø£¦|Liger-Zero]
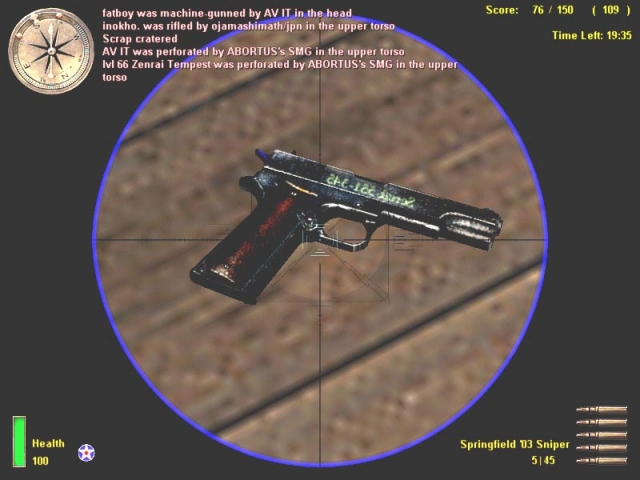
Black Old Colt 45
A Very Accuraty colt 45, it's old and black and it empty shotgun shells. In two shots you've get a man down... Very powerfull as you see. (only the skin works in multiplayer, the bulletdamage only in SP) Enjoy Installation: Put The PK3 file in the main folder. Unninstal: Delete The PK3 file from the main folder. Any problems: Mail me: koensieben622@hotmail.com
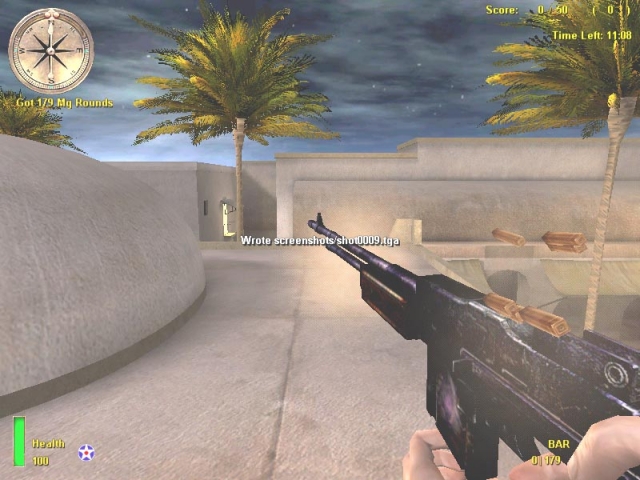
Black Old Bar
This is a Bar hwo's Black old and rusty. It is more realistic because in the origional skin there's a lot of gloss... In real looks like this... Enjoy Installation: Put The PK3 file in the main folder. Unninstal: Delete The PK3 file from the main folder. Any problems: Mail me: koensieben622@hotmail.com
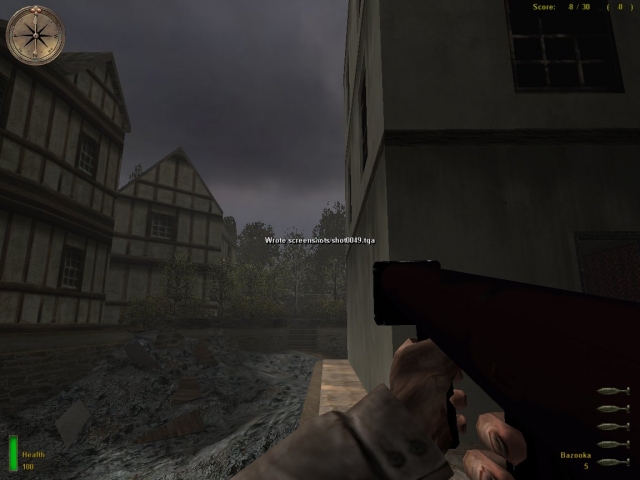
Black Bazooka
Willis' Blac Bazooka Enhances the Bazooka by changing the textures and giving it a more used and combat worn look with a black finish. Adds more realism in terms of textures.Was tested on Medal Of Honor Allied Assault. May not work on Medal Of Honor Allied Assault Demo or Medal Of Honor Allied Assault Spearhead. Install: Put the pk3 files in your main folder Contact: winterscapt@hotmail.com
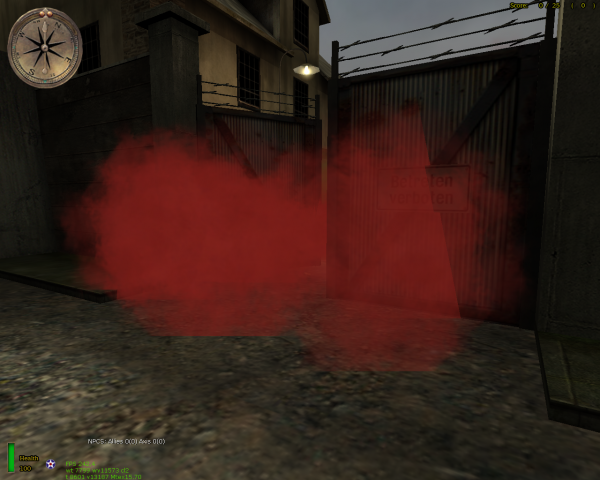
Dhs Axis Allies Smoke
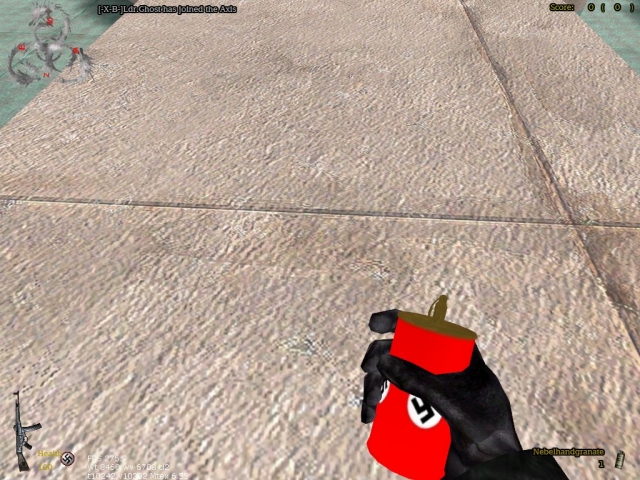
This file might not work properly. Allies & Axis themed smoke mod by .¦RRA¦.ÐirtyHarry::A:: -Changes Allies smoke to blue color -Changes German smoke to red color works for Spearhead and Breakthrough extract to mainta or maintt to install, remove to uninstall enjoy
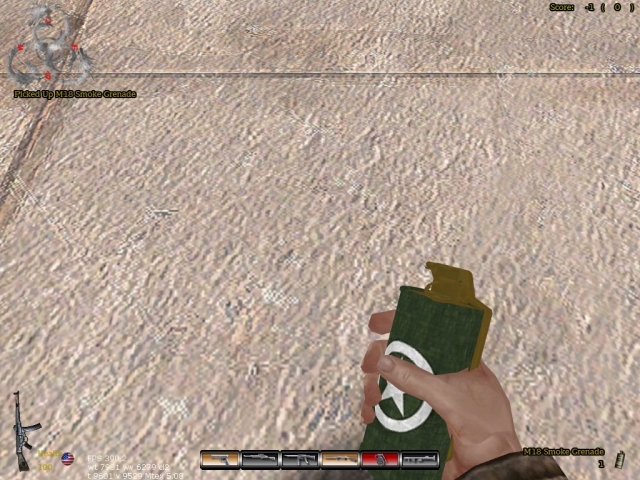
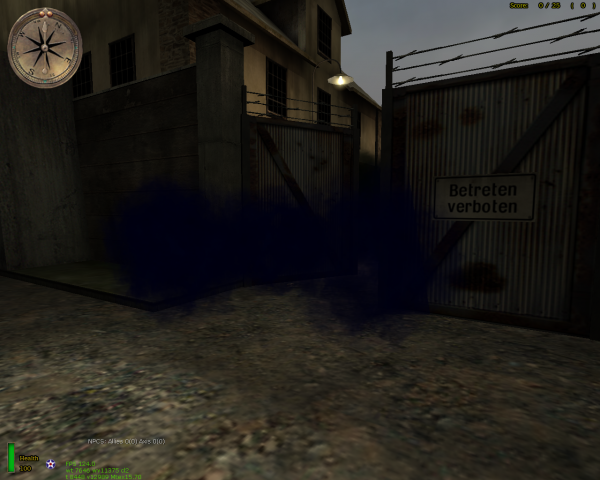
Bca Battle Smoke
BCA Battle Smoke ----------------- -This darkens all the smoke from the smoke grenades for Allied, Axis, Soviet, and the default smoke file -It also changes Allied smoke to blue instead of red (but darker, of course). The original smoked seemed a little 'arcade' with the bright red, green, and yellow colors. INSTALLATION: ------------- Just extract 'user-BCA Battlesmoke.pk3' to your ". . .\Mohaa\mainta\" folder. This naturally requires the Spearhead Expansion pack to enjoy. -[BCA] Kamikazee Driver
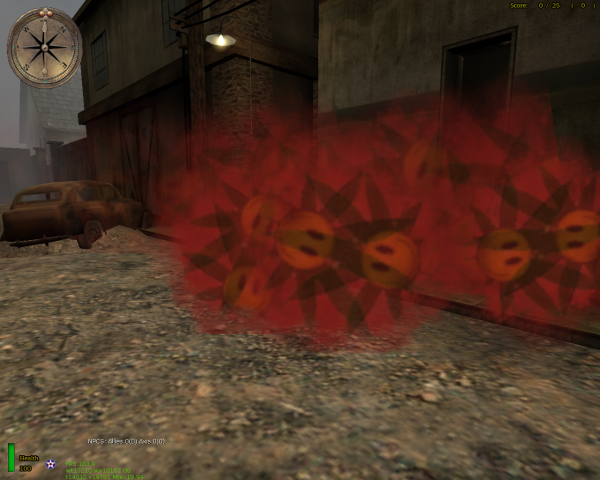
Pot Smoke Battle Smoke 2
BCA Battle Smoke 2 ----------------- Put a leaf with a smiley at the center overlayed over smoke texture with about 30% opacity INSTALLATION: ------------- Just extract 'user-potsmokegrenades.pk3' to your ". . .\Mohaa\mainta\" folder. This naturally requires the Spearhead Expansion pack to enjoy. -[BCA] Kamikazee Driver
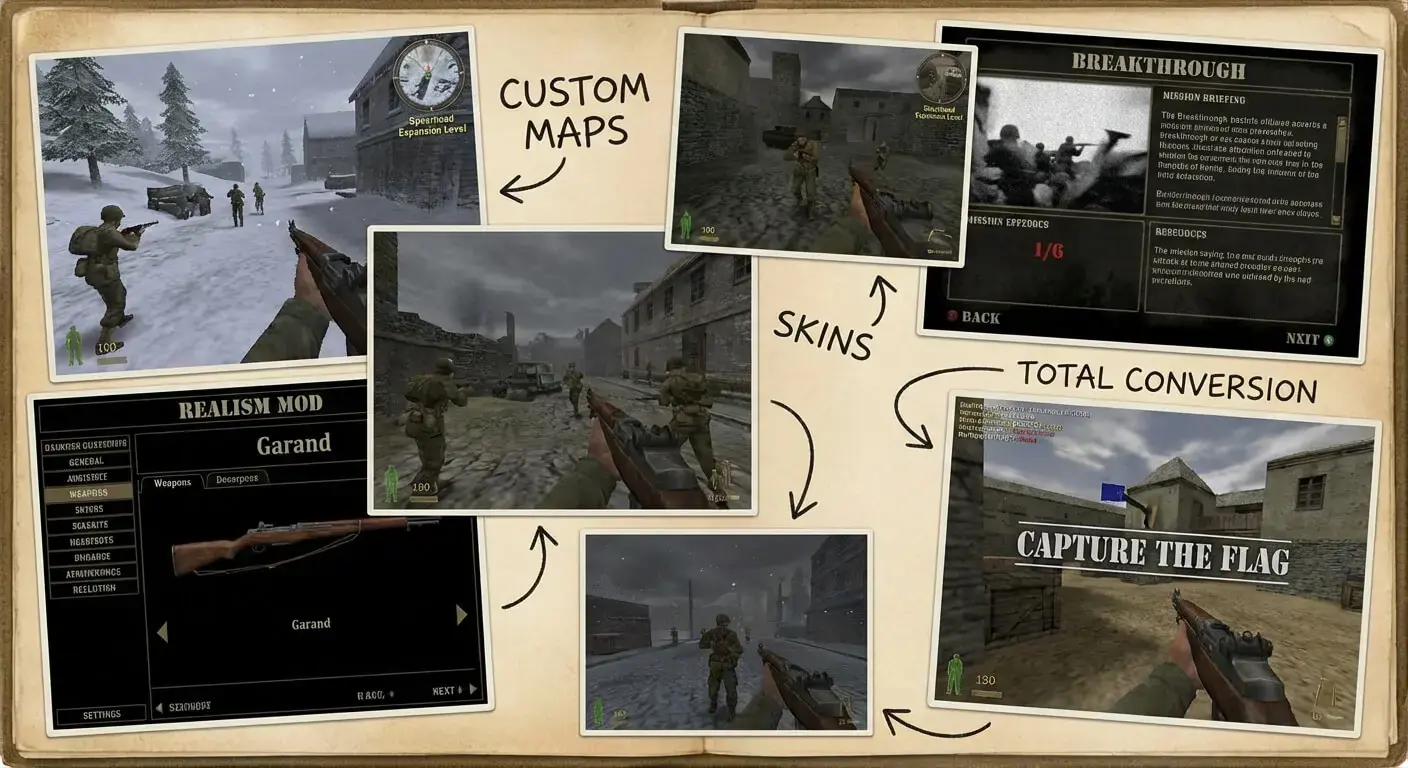
Medal of Honor: Allied Assault Mods (MOHAA) — Complete Community Archive
Welcome to the premier repository for Medal of Honor: Allied Assault mods. Since the game's groundbreaking release in 2002 by 2015, Inc. and EA, MOHAA has inspired one of the longest-standing modding communities in first-person shooter history. MOH-DB preserves, categorizes, and serves over 1,600 verified community modifications, custom enhancements, and competitive utilities for Allied Assault, Spearhead, and Breakthrough.
Explore MOHAA Mod Categories
Player Skins & Uniforms
Over 700 historically accurate and creative player uniforms for Allied and Axis factions. Equip authentic U.S. Army Rangers, 101st and 82nd Airborne paratroopers, British Commandos, Soviet Red Army conscripts, Wehrmacht Heer infantry, Fallschirmjäger, and Waffen-SS camouflage patterns, as well as classic community clan skins.
Weapon Models & Reskins
Enhance your WWII arsenal with ultra-detailed weapon replacements and high-resolution textures. Popular downloads include authentic wood-finish Kar98k sniper rifles, realistic metallic sheen M1 Garand models with classic "ping" animation refinements, Thompson submachine guns, MP40s, BAR 1918 rifles, and custom iron-sight alignments.
Soundpacks & Realism Audio
Transform the sonic atmosphere of Allied Assault. Replace compressed 2002 Quake-engine sound effects with cinema-grade gunfire recordings, authentic distant artillery rumblings, terrifying Stuka dive-bomber sirens, supersonic bullet cracks, metal ricochets, and remastered German and American voice callouts.
HUDs, Menus & Crosshairs
Modernize the in-game interface for 1080p, 1440p, and 4K widescreen displays. Download minimalist competitive heads-up displays, custom dot and crosshair overlays, cleaner compass indicators, redesigned main menus, and unobtrusive health and ammunition counters favored by competitive league players.
Server Utilities & Admin Scripts
Run resilient, modern multiplayer game servers with essential server-side utilities. Includes automated map rotators, anti-cheat detection tools, voting scripts, custom match timers, ping balancers, and administrative rcon managers designed for dedicated servers running 24/7.
MOHAA Reborn 1.12 Community Patch
The gold standard community patch for modern MOHAA servers and clients. The Reborn 1.12 patch resolves legacy buffer overflows, fixes client query exploits, expands internal script limits for complex mods, and provides a built-in server browser to replace the defunct GameSpy master server.
How to Install MOHAA Mods: Quick Guide
Identify Your Target Directory
MOHAA stores all game assets in subfolders inside the root installation directory:
- MOHAA (Base):
.../MOHAA/main/ - Spearhead:
.../MOHAA/mainta/ - Breakthrough:
.../MOHAA/maintt/
Paste Without Extracting
Download the mod archive from MOH-DB. If it is zipped (.zip or .rar), extract the enclosed .pk3 file. Place this .pk3 directly into your game's /main/ folder.
How to Remove or Troubleshoot
To remove any mod, simply delete its .pk3 file from the /main/ folder. The game will immediately return to stock behavior without reinstalling.
Frequently Asked Questions about MOHAA Mods
To install MOHAA mods, copy the downloaded .pk3 file directly into your Medal of Honor Allied Assault installation folder under /main/ (or /mainta/ for Spearhead, and /maintt/ for Breakthrough). You do not need to unpack or extract the .pk3 archive—the game engine loads it automatically upon launch.