Medal of Honor: Allied Assault Mods (MOHAA)
Discover and download community-created modifications to enhance your Medal of Honor: Allied Assault experience.
68 Mods Found
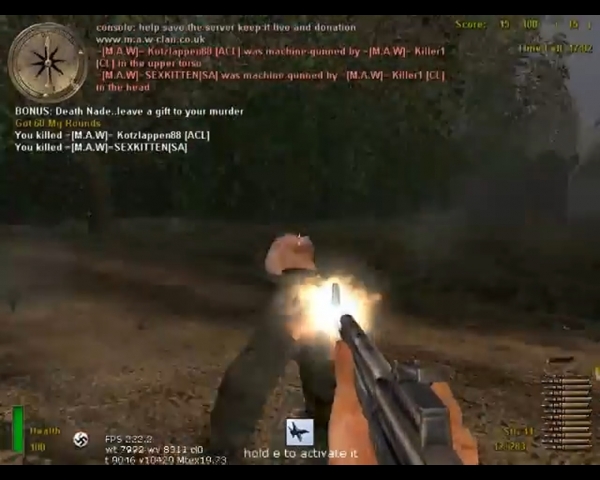
Rewards Mod
This a Rewards Mod Depending how many kills you have done in a row you get a reward like this ones: 1 - Send Air Strike to attack the enemy team ( you get the kill if you kill someone ) 2- Send Dogs to attack the other team ( you get the kill if they kill someone ) 3 - Send Helicopter Bot to attack the other team ( you get the kill if he kill someone ) Feature: When you hit someone your crosshair change. -------------- INSTAL ------------------------- Only need to put on the main folder
.jpg)
Elgbot 222 Serverside Stats
Elgbot Serverside 2.2.2 [Author: Elgan] (Unofficially updated by OwN-3m-All {minor changes only}) Elgbot is awesome, and I thank you Elgan for making one of the best mods ever! 2.2.2 [April 17, 2012] - OwN-3m-All fixed the post-round statistics HUD so that it does not display once elgbot is turned off (cvar to 0) and the map is changed. - Fix is also more efficient... HUDS are no longer continuously drawn on clients... it gets drawn once. - Fixed a few crashing events in Reborn RC3 caused somewhere in event handler scripts. (Added additional null checking... seems to have fixed the problem, will update the mod if it does not.) - Fixed strings.scr file. Was not returning lower case text with previous version... - Updated Documentation (create elgbot folder in MOHAA/MAIN directory of server and chmod 777 on the elgbot folder to save stats permanently) 2.2.1 Updated strings.scr Updated to use new strings.scr Will not , if a filename (user name) is invalid. will use IP instead. Warnings are now printed using confprint command (reborn patch) Strings.scr edited, clean_filename will not only use chars found in its safe array 2.2.0 Added intermission event from Reborn patch RC 2.5 Gamma 2.1.0 Added top players scoreboard. Prints to game chat killing sprees Simplified who killd who code. Added assists to player score display stats Fixed blank hud draw string bug on linux servers Deprecated elgbot_continuoussave. All stats now use AP style cvar saving. Added percentages to stats menu Added stat "assists" Added stat "rounds" Added stat "Team kills" Added stat "Time Played" Added awards menu on next round start for last rounds players. Added stat "kills" for each weapon, Added stat "total kills" for each weapon, Added new menu to show weapon kills and total kills with their percentage from your total kills Added KDR, kill Death Ratio Added new scoreboard information , now shows at timed events, row kills, deaths leaders, current most lethal, damaging, dangerous, accurate and deadly Added Awards system. Editable. Showing but not limited to the fllowing stats Added stat "Most Lethal" Added stat "Most Deadly" Added stat "Most Accurate" Added stat "Most Damaging" Added stat "headhunter" Added stat "Bash king" Added stat "Melt king" Added stat "Streak King" Added stat "Taget" Changed look of stats menus Optimised code for speed. Moved all saving to cvars. Removed Best kills in a row and most deaths in a row from the game hud. Feel they are nto used, and cuts down on in game hud. Added system to detect intermissions. 2.0.4 Improved performace on elgbot_continuoussave. Skipped reading, to save crashes Added abilities to see melts in more FT gametypes Added elgbot_sounds cvar to play sounds local or global 2.0.3 Added stat axis, allies. (Which team you were) Removed scrolling instructions to save crashing and lag Now use event "spawn" as well. elgbot_fnametype default is now 3. Fixed location recording bug 2.0.2 (untested, just written) Added cvar elgbot_fnametype. 1 or 2. This sets if the script should use IP's or player Names for the filename. Fixed crash with gotkills not being a player Fixed hud after a round Added stat "melts" for FT, and code for adding stats for any Mefy game type. Added cvar "elgbot_continuoussave", to save every stat change, to save stats over round based games for now. Fixed gotbash / bashed typo Changed menus to be a little nicer. Changed font size on instructions menu to be smaller and NOT virtual res Changed font on display stats to be the same as game font. Rewritten some code to make adding stats easier. Changed the player scoreboard menu for teams 2.0.1 (untested, just written) Added scoreboard menu on key bind "keyp 3" Added cvar "elgbot_announceend" Added stat "endedspree". Counts how many killing spree's you have ended. Fixed respawn debug line left behind. Fixed instructions for global 2.0 Tracks killing sprees and stats for your server Client event sounds for killing sprees and double kills. As well as headshots can be downloaded. Install --------- 1. Create a folder in your main named "elgbot" - This is for stats 2. place zz_elgbot2.pk3 in your main folder 3. Edit the server config file. NOTE; When using menus. If you are using MOHAA's flood protection sv_floodprotect Then they may act very slow. Cvars: ------- elgbot -1,0...on or off. elgbot_sounds - either 1 or 2. Will default to 1, if not set. 1 is play sounds local, 2 is play sounds global elgbot_fnametype - This must be set to 1, or 2. if left, 3 will be set by default. 1 - This will use a players IP for the stats file. 2 - This will use a players name for the stats file 3 - Use both. The players name is proceeded by the players IP. elgbot_version (You do not need to set this in console) - What version (for reading only) elgbot_dbltime - Time between double kills possible elgbot_writestats - Write stats or not? 1/0 elgbot_announce - Announce events in console on or off 1/0 elgbot_announceend - Announce the end of someoens killing spree in console on or off 1/0 An example config ------------- set elgbot "1" set elgbot_dbltime "20" set elgbot_writestats "1" set elgbot_announce "1" set elgbot_announceend "1" set elgbot_continuoussave "1" Events used ------------- disconnect connect keypress killed damage spawn intermission Conflicts ------------- This mod used strings.scr This mod used files.scr This mod used mike torso.st (for accuracy) This mod uses events Moddability ------------- This mod is very flexible. It is scripted on events and an object oriented system. This mod uses File objects, player classes and stat objects. You could easily add any stats to arrays and have them saved. THe menus are the most limiting factor, if new stats are added. They need editing. You are free to mod it as you desire. Please post in forums for help. Stats and websites ------------- Stats are saved in an ini file format. This could be read easily by any programming language. In order to store permanent statistics on the server, you must create a folder called elgbot in the MOHAA\MAIN directory on the server. This folder must then have all permissions, so chmod 777 on the elgbot folder.
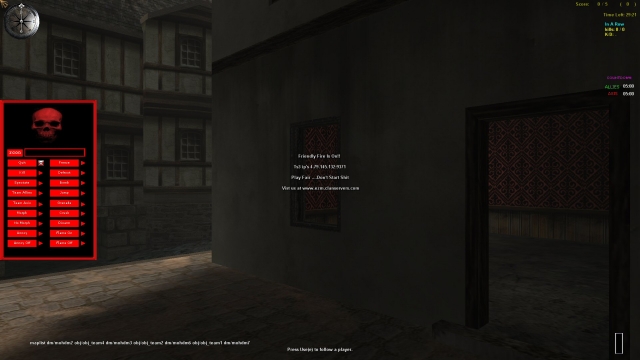
Jims Punishments 2 Mod Menu
put the menu in client main folder put the jims punishment2pk3 in server main folder Here is a menu to go with Jim's Unusual Punishment 3 that I made. Not everything is in the menu Somethings don't work with the reborn patch, so I didn't added them. Inculed: 1. Jim's Unusual Punishment2.pk3 2. EZM Punishment Menu Install: 1. Put zzzzzzzzzzz_Jims_Unusual_Punishments 2.pk3 in server's mohaa/main folder 2. Put zzzzz_EZM_Punishments_Menu in client's mohaa/main folder ////////////////////////// // 18 MENU COMMANDS // //////////////////////// 1.Quit: !quit quit:quitreason ( HAS TO TYPED IN RCON ) example - !4 quit:cheating Forces a player to quit the game or forces a player to quit the game and prints a message saying he/she was forced to quit /////////////////////////////////////////////////////////////////////////////////////////////// //The following commands may be only used on active players (players that are not spectating)// ////////////////////////////////////////////////////////////////////////////////////////////// 2.Kill: !kill example - !4 kill Forces the player to kill themselves 3.Kick: !kick kick:kickreason ( HAS TO TYPED IN RCON ) example - !4 "kick:bad behavior" Kicks a player or kicks a player and prints a message saying why he/she was kicked 3.Join Team Allies: !jointeamallies Forces a player to join the team with the least players or join the team specified within the parameter 4.Join team Axis: !jointeamaXIS Forces a player to join the team with the least players or join the team specified within the parameter 5.Spectate: !spectate Forces a player to spectate 6.Take Weapons: !takeweapons Takes all weapons from a player 7.Freeze: !freeze freeze:message ( HAS TO TYPED IN RCON ) example - !4 "freeze:stop spawn killing" Stops a player from moving and makes them invincible- designed to get a players attention. Can optionally send the frozen player a message. 8.Defrost: !unfreeze Unfreezes a frozen player- makes them vunerable again and allows them to move 9.Grenade: !grenade Forces a player to pull out a grenade (even if they dont have any left in thier inventory), pull out the pin and hold the grenade until it explodes. Fustration for the target player is gaurenteed! 10.Jump: !jump Launches the player severall hundered feet into the air- gravity then takes over and consquently the player ends up very dead. The ammount a player can be launched into the air is determined by the skybox height in each map. 11.Flame on: !flameon Sets a player on fire, damaging over time until they are either extinguished or resemble a smoldering corpse. 12.Flame off: !flameoff Extinguishes a player if the flameon command has been applied to them (can also disable flames from the anticamp command momenterily) 13.Crush: !crush:10 crush:delayseconds ( HAS TO TYPED IN RCON to change time) example - !4 crush:10 Spawns a large, heavy bell over a player: it will follow them arround until the delay timer has expired- this can be set manually via the delay paramater or left at the default of 5 seconds. Once the timer expires the bell will drop- if anything gets in the way of the bell's path (such as a telephone line) the bell will not land on the player and the player will be saved. However if the bell's path is clear it will crush the player instantly, killing him/ her. 14.Bomb: !bomb:15 bomb:timeseconds ( HAS TO TYPED IN RCON to change time) example - !4 bomb:15 Attaches a bomb to a player- fuse can be set manually with the timer parameter or left at the default value of 5 seconds. On detonation bomb will kill player and no one else. 15.Annoy: !annoy Forces a player to look at random angles every 3 seconds, effectivly preventing them from moving or aiming- essentially annoying the balls off of them. 16.No annoy: !noannoy example - !4 noannoy Returns players viewing angles to normall. 17.Morph: !4 morph:DOG morph:model example - !4 morph:DOG ( HAS TO TYPED IN RCON to model) Morphs a player into a new and exciting shape- this can be controlled by the model parameter (accepted models are- tree, toilet, haystack, clock, bath and piano - toilet is selected by default). On morphing a player will loose the ability to hold or shoot a gun, will alert all players of his new shape with a dm message to all players and will essentially be nothing more than a bit of target practice until dead or until the admin reverses the morphing. 18.No morph: !nomorph example - !4 nomorph Reverses the morph command on a player and returns them to thier normal shape //////////////////////////////////////////////////////////////////////// // THESE ARE EXTRA COMMANDS NOT IN MENU BUT CAN BE USED THROUGH RCON // ////////////////////////////////////////////////////////////////////// ( NOTE: Anything with !all command I think it was.) Overview: Jim's Unusual Punishment 2 is designed to help admin a server by performing basic functions such as printing messages to players, forcing skins and weapons to advanced features such as forcing anti camping zones on players, providing spawn protection for teams, artillery strikes and then punishment commands such as bombing a player, setting a player on fire or morphing them into different objects. It provides commands for invidiual players as well as teams and all players within a server. Using the commands: Using the commands is very simple- simply log onto rcon on your server and then depending on what commands you want to send, use the following format: For invidual players: ![client number] command:commandparam examples- !4 kick !12 bomb:15 !13 "message:Please do not typekill in this server" For Teams: ![teamname] command:commandparam examples- !allies quit !axis artillery:600 !spectator "message:please join a team or be kicked for inactivity" For all players: !all command:commandparam examples- !all swapteam !all "message:This server is shutting in 10 seconds for maintaince- it will be back up in 5 minutes" Hints and tips on using the commands: The command paramaters are not normally required (see command list below for more details) but they give extra controll over certain commands Client numbers can be found by performing the status command or checking the score board - it is the number next to a player's name. It will be nessacerry to enclose any commands with spaces within thier paramaters ( " " ) to make sure they execute correctly (see the message command examples above). Remember to preceed the commands with rcon! Player commands: Lists the command name, command execution name, command execution name with parameter (if applicable), example and description. The command header !4 has been used as an example. For applying the command to particular players and teams see above- all player command may be applied globally or to any team (certain ones may not work with the team spectator, see bellow for details) but not all are recomended for team/ global execution due to the complexity of certain scripts. Name: name:playername example - !4 name:The_Trooper Forces a new name on a player. Please remember that if you want to include blank spaces in the player's new name, enclose the command and the command parameter in quotes "". Message: message:messagestring example - !4 message:hello! Prints a message to the specified player/ players. Please remember that if you want to include blank spaces in the message, enclose the command and the command parameter in quotes "". Allied skin: alliedskin alliedskin:model example - !4 alliedskin:allied_101st_captain.tik Either forces the default allied skin on a player (american_army) or forces a specified skin on a player Axis skin: axisskin axisskin:model example - !4 alliedskin:german_DDay_colonel.tik Either forces the default axis skin on a player (german_wehrmacht_soldier) or forces a specified skin on a player The following commands may be only used on active players (players that are not spectating) Drop weapon: dropweap example - !4 dropweap Forces a player to drop the weapon they are currently holding Holster: holster example - !4 holster Forces a player to holster the weapon they are currently holding Give weapon: giveweap giveweap:weaponmodel example - !4 giveweap:ger.mg Gives a player a specified weapon- accepted weaponmodel names are: us.rifle, us.sniper, us.smg, us.mg, us.rocket, us.shotgun, ger.rifle, ger.sniper, ger.smg, ger.mg, ger.rocket, ger.mortar. May be left blank - a player will be assigned a smg, depending on what team they are on. Force weapon: forceweap forceweap:weaponclass example - !4 forceweap:sniper Forces a player to use a specific weaponclass- this will affect a player when they next respawn. Either specify a weaponclass (rifle, sniper, smg, mg or heavy) or leave it blank and the player will be assigned the smg weapon class automatically. Will also print a message to the player telling him/ her what new weaponclass has been selected for them. Stuff: stuff:stufftext example - !4 "stuff:set rate 20000" Stuff's text to a player's console- ideal for forcing transfer rates, skins etc. Please note that this command allways requires a parameter and on most occasions will need to be enclosed with quotes. Type killer (SH+ only): typekiller example - !4 typekiller Designed to fight typekillers- will remove a kill from a players score, damage them by 15 and print a message from the player stating they were punished for typekilling Anti camp: anticamp anticamp:radius example - !4 anticamp:600 Places an invisible anticamp zone within the map that the player may not enter without being punished- the position of the zone is determined by the players position when the command is initially called and the size of the zone is determined by the radius parameter (can be left blank and radius will default to 400). If a player is detected within this anticamp zone, they will be set on fire until they leave the area. The anti camp zone will remain for 30 seconds. A tip on distances- they are in relation to the MOH world, not in metres etc. a rough guide for you: for a small anticamp zone use 200, medium - 400, large - 500+ Antinade: antinade example - !4 antinade This command was developed to counter player who cant/ wont use grenades as they are supposed to- ie. not constant, cooked, underarm throws. This command will force a player to use a modified grenade model that has no underarm throw and can only be cooked for 2.7 seconds with the overarm throw. No Antinade: noantinade example - !4 noantinade This will disable the antinade command for the specified player. Artillery: artillery artillery:radiusofimpact example - !4 artillery:300 Papa's got a brand new bag- artillery. This command will send 9 artillery shells randomly arround the player's origin- the radiusofimpact parameter will decide how far from the targeted player the artillery shells will hit (may be left blank, will default to 400). Shells will kill/damage the players own team. Anyone caught in the blast area will be given a few seconds warning before the artillery strikes to prepare them and allow them to seek cover (shells cannot penertate buildings etc) Special team commands: The following commands are specific to the allied or axis teams and may be executed using the !allies or !axis command headers. Bombard: bombard bombard:detectradius example - !allies artillery:300 Bombard utilises the artillery command but with a twist- it will try to calculate the biggest gathering of players (on the specified team) within the detectradius (this can be specified through the command parameter or left at the default of 450). The artillery stike will be centered arround the player that has been determined to have the largest collection of players arround him/ her. Read the artillery command above for more info. Spawn protect: spawnprotect spawnprotect:timeinseconds example - !axis spawnprotect:15 This command helps a team defend thier spawn site by making them invincible (either for the ammount of time in seconds specified by the command parameter or the default value of 10). Only players who have recently spawned (last 20 seconds) will be turned invincible, however if a player should die and respawn and the spawnprotect is still in effect, they will repsawn invincible for the remainder of the time. Players are surrounded in a yellow (ish) glow and all players are notified of the team's invinvibility. Special global commands: The following commands are applied globally, using the !all command header. Message: message:message example - !all "message:cheating is not tollerated" This will print a global message instead of forcing each player to print the same message to themselves. Swap Teams: swapteams example - !all swapteams Will swap players on the allied/ axis teams arround- usefull for clan matches etc.
Ping Function Script
/************************************************************************************ global/functions/ping.hal -=-=-=-=-=-=-=-=-=-=-=-=- by Hal / @(...:.:...)@ 06/07/06 1st.regiment@gmail.com http://www.modtheater.com/forum/member.php?u=5281 ========== Info ========== Ping script for testing. I duno what kind of numbers it will spit out. :S ========== Cvars ========== All cvars start with "sv_ping_" so if you forget a cvar, and the script is running localy you can type "sv_ping" in the console, then press tab to see the cvars starting with that. "sv_ping_start" Set to 1 to ping all players on the server once. The script stops after pinging everyone. Don't set this in the cfg, just set it through RCON when you wish to ping everyone. "sv_ping_stufftext" Makes the player say what ping he has with stufftext after the script has pinged him. Set to 0 to turn off reporting with stufftext. It will report with stufftext by default unless you set it to 0. "sv_ping_fps" This is an important cvar to set. This controlls how acurate the ping result will be. This is the number of frames / second the server will process wile pinging a player. This must be 20 or more. I recomend 80 or more which is default if you don't set it. 80 = 12.5ms acuracy 200 = 5ms acuracy You work out the acuracy by dividing 1000 by your chosen fps rate. (1000 / 80 = 12.5). Note - The server is returned to normal 20 frames/ second after pinging each player. "sv_ping_timeout" This controlls how long the script will wait for a ping response before giving up. This also acts to prevent an infinate loop, in the event of a player leaving the server, or the script losing track of the player somehow. Must be more than 0 and less than 20. I recomend 2 seconds which is default if you don't set it. ************************************************************************************ */
Player Counter
This script/mod will show the number of players currently on the server on the screen (although it might exclude the spectators). To activate this mod add: exec global/playercounter.scr to Dmprecache
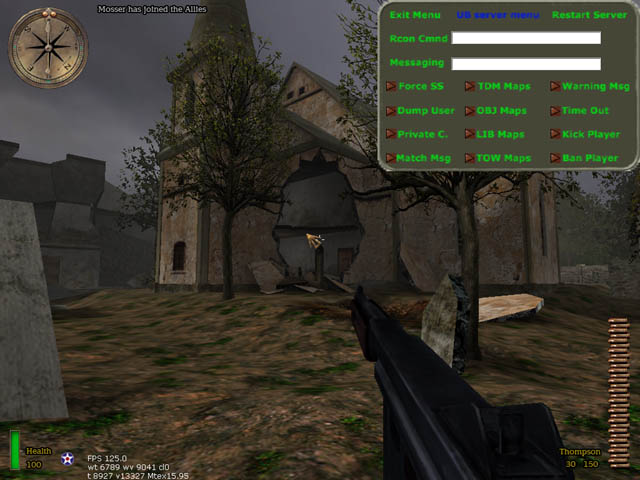
Ci Admin Menu
unclebob Milwaukee,WI 3/20/2006 Hay all unclebob with some more hopfully NOT useless stuff! It is a server ADMIN Menu for those of you that use CI = Counter Intelligence If at this point you are saying what is CI? Then you do not need this file, Move on to the next one! As always I tried to make it easy to use for all. INSTALLATION: Unzip the file you just D/L, wait I am in the Zip file ok scratch that. In the folder UB CI SERVER MENU with this readme are TWO items a .pk3 file & a config file each named UBmenu COPY both into YOUR (NOT the SERVER) games main folder Main = MOHAA MainTA = MOH SH MainTT = BT Now let’s set up a few things. Open the UBmenu.cfg with notepad or some text editor You should see this: ********************************************************************** // Sets up the menu Functions!! bind F8 "togglemenu UB_menu_SH_BT" rconAddress 00.00.00.00:12203 rconPassword ****** ********************************************************************* Ok you're there now. Don't do anything to this line: // Sets up the menu Functions!! If you want you can change the button the menu is binded to by changing the two stars to the key you want: bind ** "togglemenu UB_menu_SH_BT" Otherwise just use F8 Now add your server's IP Address. This way you can use the Menu even if you’re in another MOH server: rconAddress 00.00.00.00:12203 And finally your server's Rcon Pass: rconPassword ****** Now you don't need to type all that crap in each time right? Wrong! At this point if you were to start the game none of this would work. Because, we need to tell the game console to execute the config. There are two ways to do this. 1. Open the console each time you start MOH & type: exec ubmenu.cfg Then hit ENTER!!! 2. Right click on your Desktop icon for MOH then hit properties. Look for TARGET, in a box next to it is "C:\Program Files\EA GAMES\MOHAA\moh_Breakthrough.exe" Add this to the end +exec ubmenu.cfg Be sure to keep the space so it looks like this "C:\Program Files\EA GAMES\MOHAA\moh_Breakthrough.exe" +exec ubmenu.cfg Ok then hit apply at the bottom of the window & Then OK. Now start MOH, well in the main lobby hit F8 (or what ever key you bound the menu to) If all is well a bland Grey & Green Menu will pop down on the upper right corner of the screen & the rest will turn BLACK That’s it. It’s all ready to go. So go in your server & try it out. CAUTION: don’t hit 50 options in 30sec you will crash your server WHAT ARE THE OPTIONS: ********************************************************************************************* EXIT MENU UB Server Menu Restart Server Rcon Cmnd --------------------------------------------------------------- Messaging --------------------------------------------------------------- Force SS TDM Map Warning Msg Dump User OBJ Map Time Out Private C. LIB Map Kick Player Match Msg TOW Map Ban Player ********************************************************************************************* Exit is obvious but Restart Server ONLY restarts the map! So if you change something via Rcon & it doesn’t take effect hit restart & it will reload the map & your command should then take effect! RCON Cmnd = Just like the console just you don’t have to type RCON or hit the ~ key anymore Messaging = Is used to play GOD OF THE SERVER or to just say stuff as the console so ppl may actually listen, Yeah RIGHT! Force SS = Forces the standard anti cheat Screenshots on the player. Not that anyone ever sends them in!! Dump User = Writes that users info to the CI events log. Private C. = reset the servers private client slots so as to lock the server. Match Msg = Perset console messages for scrimmages or even a tourney. TDM, OBJ, LIB, & TOW Map are all the stock maps set to load with a click of a button (DONT run maps for SH & BT in MOHaa or BT maps in SH it will CRASH your server) Also OBJ maps run round based?? Working on it & when you end a map it goes back to the start of the map rotation BUT will stay in the game type of the last map until you restart the map! Warning Msg = Preset warning messages to the players via console. Time Out = Forces that player to spectator for a set amount of time. Kick Player = Like I need to explain! Ban Player = Banns that players IP from the server! ********************************************************************************************************************** As always! This is freeware so have fun but if it goes bad & the magic smoke comes out Don't even try to blame me. after all I'm broke!
Dust_Clan_Tags_final
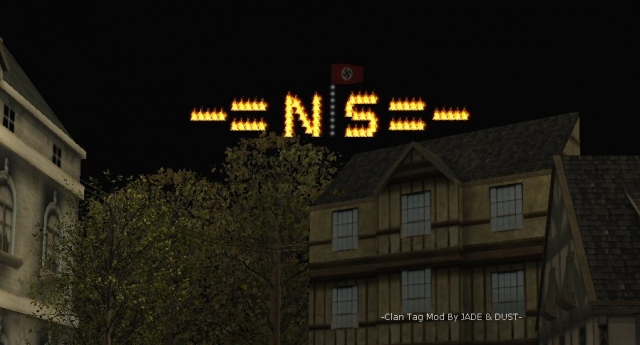
Clan Tag Mod By JADE & DUST- Changes: 1.) Made 1 folder for each letter type , now you only need to add exec FLAMES5/N5.scr::main Instead of exec LETTERS/ALWYAS_SHOW/EMMITERS/N5.scr::main. Folders are numbered with their colors. WHITE1 A-Z + - = | RED2 A-Z + - = | GREEN4 A-Z + - = | ( SH ONLY ) FLAMES5 A-Z + - = | FLASH A-Z + - = | ( make letters blink on or off all letter types in this folder you still use letter numbers just change the folder name ie exec FLASH/N2.scr::main would be blinking red N see note 3 below ) EMMITERS ( FIRE WORKS ) GLOBAL 2.) Added more letters for each color/type there are now 5 of each, which will give you more options on what you can make. 3.) Added 3 new characters - = | 4.) Removed the following letter types Blow Torch Breath Electric Arc Adams Spark Orange Letters 5.) Made the orb scales smaller for a crisper looking tag. 6.) Changed clantags_settings.txt to clantags_settings.cfg (for some reason Spearhead wudn''t exec it as a txt file) 7.) Added Spearhead maps to clantags_settings.cfg 8.) Made a clantgas_settings.scr file to be also used to replace the cfg if you wanted to, just change exec clantags_settings.cfg to exec clantags_settings.scr in ambient.scr. 9.) Made a flag.scr to replace the fireworks.scr if you want, I found that while the fire works looked cool, if you get too many people shooting it off it make server lagg. Install: 1.)Place the user_Clan_Tags_rev2.pk3 and the clantags_settings.cfg in main/mainta/maintt folder ( haven;t tested it on BT ) 2.) set up your clantags_settings.cfg ( I put my cfg in here as a template on how to do it ) Setting Up The Clantags_Setting.cfg: 1.) Make sure you have developer on so you can get your coords. 2.) Start a game, go to where you wish to place your clan tags. 3.) Open console type in coord, write down the coord, it will look like this, location: 504.00 216.00 -31.00 angles: 0.00 0.00 0.00 axis: 1.00 0.00 0.00 (use 'tele' or 'face' to set) all you need is the first set of numbers, 504.00 216.00 -31.00 Thats your starting point. 504.00 is left to right, 216.00 is in and out -31.00 is up or down. 4.) In the settings cfg add these numbers exec FLAMES5/N5.scr::main ( 504.00 216.00 -31.00 ) ( 0 0 0 ) 1 Now save it and go back in game and you will see a flaming N in that spot. Then just repeat this untill you have all your letters set. I found that once you get your first letter where you want it, sub tract 128 from the the first number and you will be close to where your next letter should be. ( 504.00 216.00 -31.00 ) so your next letter would be at ( 376 216 -31 ) exec FLAMES5/N5.scr::main ( 504.00 216.00 -31.00 ) ( 0 0 0 ) 1 exec FLAMES5/S5.scr::main ( 376 216 -31 ) ( 0 0 0 ) 1 If you use the letter I or the | in your tag you would sub tract 48, then back to sub tract 128 for the next letter. The last 2 letters in your coord will not change after they are set, all you need to do is get the first number right. **** NOTES **** 1.)You can't change the angles of letters so you are limited on where in the map you can put your tags, they only face one way. However with the extra letters you can put your tags in more than one place in the map. ( see screen shots ) 2.) In Spearhead you can not use the Weather11.scr for making it a night time look in the following maps: MP_Flughafen_TOW MP_Ardennes_TOW MP_Verschneit_DM 3.) Falshing letters are set as follows from bottom of letter scr's: blinky: while (1) { wait 10 // time to wait before hiding tags self hide wait 180 // time before showing tags again self show } end Video link http://social.xfire.com/videos/631c4f
EZM Admin Mod
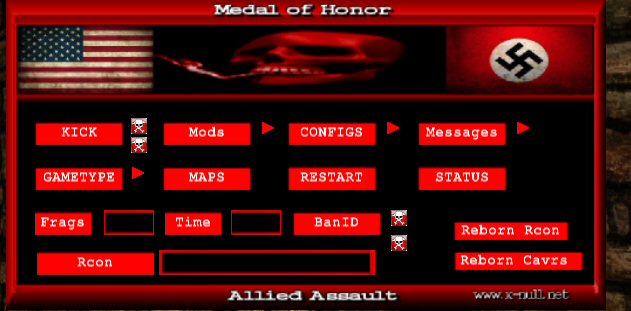
Easy Meat Mods First let me just say up front, I did not make all of the mods in here, I just edited some of them to do what I wanted. Any mod used here still has the modders name in the script file, if he put it there to start with. And then some I made, with a lot of help from the guys at X-Null. Now let me explain just what this thing is, it's a few mods I put together, with a simple way to turn them on or off. 1.) Random teleporters What this does is place random teleporters in all the maps, both the starting points and the ending points are random. They can be anywhere on the map, you might teleport to the Objective so you can set bomb, or you might end up in a mine field, you just never know. Or on a TDM map you mat end up on a roof, other teams spawn, anywhere at all, may teleport 30 feet in the air. 2.) V2 Anti Axis Rush Mod There is a teleporter in vent room, noob door and at begining of long hall, if a axis player crosses the orb he gets teleported back to spawn and all his weapons are taken away, except for the p38 wth no ammo, he has to bash the rest of the map. ( note: You need Reborn for the bash only to work. Without reborn player will have the ammo amount your pistol settings are set to. ) 3.) V2 No Spawn Camp Allies This is the no camp allies mod, that bombs allied spawn after so many seconds. 4.) Kick Grenades V 1.0 Lets you kick the grenades away from you. 5.) Weapons Switch Mod Lets you switch weapon class, example from any weapons to snipers only etc. Pistols and grenades are not removed, they remain how you have them set. Weapons Options: Snipers Only (Team Snipers) Rifles Only (Team Rifles) Bolt Action Rifles Only ( Team Snipers All Others Kar98 ) Springfield Only Kar98 Sniper Only Kar98 Only M1 Garand Only Shotgun Only No Rockets (Rockets Are Shotgun) SMG Only MG Only Pistol Only All Weapons Sniper and Shotgun Only No Rockets or Shotguns ( Rockets and Shotguns Are Team Rifles ) Team Weapons (all Team Weapons) 6.) Spawn Protection To install Mod : 1.) Put the zzzzz_Em_mods-reborn.pk3 ( Reborn Servers Only) in mohaa/main folder. ( On Server) 2.) Edit the mod.cfg and put it in mohaa/main folder. ( On Server) 3.) Add exec mod.cfg to your server.cfg. Install Menu: This is a full reborn admin menu, some sections you will need the mods, cfg's etc in order for it to work, Mefy's freeze-Tag...Elgbots...custom maps etc. Also if you wnat to exec different cfg's from menu you will need to make sure the cfg folder is on server. SEE EDITING READ ME !! 1.) Put the zzzzzzzzzz_weapons_Rcon_Menu.pk3 in your mohaa/main folder ( NOT ON SERVER.) 2.) Bind a key to open menu. ( open console type in bind ( pick a key) hit enter. ) Menu Note: You don't need to use the menu, you can change everything through the console, you must restart the map after changeing settings. If you have it set to snipers only and change it to rifles only you must first turn off snipers only ( set snipers 0) then turn on rifles only ( set rifles 1) This is why I made the mod menu it will do all that for you.
zzzzzzzzz_Admin_Menu.pk3
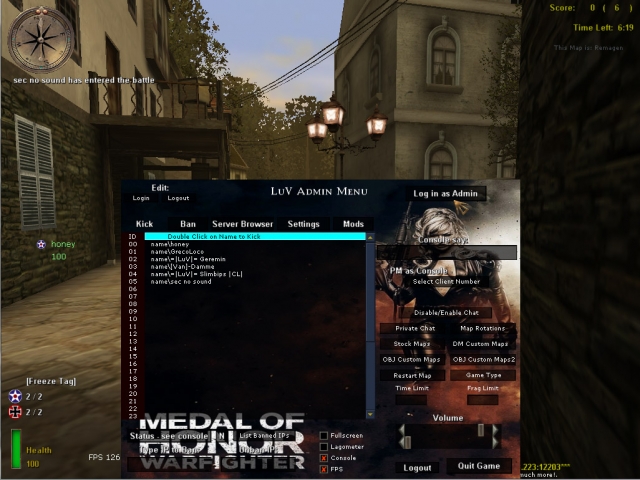
1) Place the file zzzzzzzzz_Admin_Menu.pk3 in your main folder 2) open the file with winrar or 7-zip and go to the folder configs 3) open mylogin.cfg and replace the name and password as discribed there 4) go to your server files and open admins.ini (comes with reborn patch) 5) and place a line like this: login=harry password=45passw354676 rights=7167 be sure that the name and password in mylogin.cfg are the same as in the admins.ini. after u done that (re)start your server. go in your server and press F1 to open the admintool (if it doesn not open type in console: bind f1 togglemenu admin, and try again). if the admintool opens click in the RIGHT UPPER CORNER, Log In As Admin.... and the tool should work. becease we pre-added the passwords etc u dotn have to type in passwords again... just hit the button Log In As Admin everytime u join the server. if the tool doent wokr be sure that u clicked the Log In As Admin Button. (on the left side it will display yellow letters that u are logged in as admin), so its hard to see... but u are logged in.. now test it!!........ 1 tip.... use admin pro with this it works realy great, download here http://www.mohaaaa.co.uk/AAAAMOHAA/content/adminpro-updated-version. problems with the tool??????... go to http://www.x-null.net/forums and make a thread and we will help you
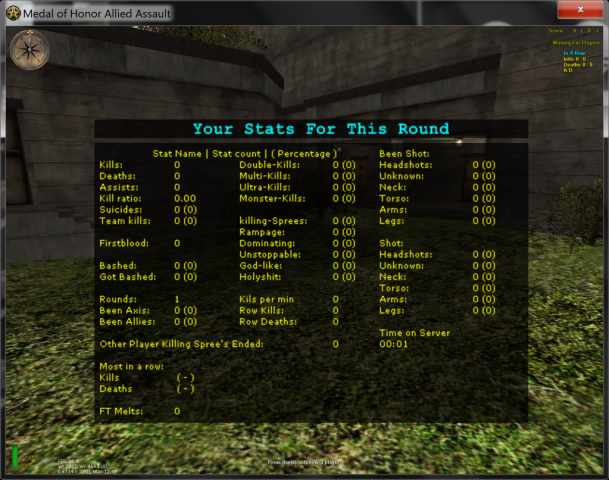
Elgbot 2.2.1 Serverside Stats
Tracks killing sprees and stats for your server. Using the client pk3 will give you Client side UT style event sounds. Killing spree's, Double kills, headshots, etc

Purple EventHandler for Reborn Patch
Very helpful script to help organise the Reborn events
Purple weapon limiter
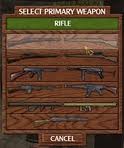
Purple weapon limiter - Completely CVAR controlled , including Ammo !!!!
Elgbot 30
Mostly a Player Stats tool (see Elgbot 2 & 4 for more info). Elgbot Version 3.0 Game; mohaa www.mods-r-us.net , modstheater.com , mohfiles.com elgan.sayer@gmail.com INSTALLING: 1. Extract the Elgbot folder anywhere on your pc. 2. place zzzElgbot.pk3 pk3 in your games main folder. 3. Run Elgbot.exe 4. Run your mohaa game. While in game elgbot should start automaticaly. To tell if its on. View your score table (tab) or look in the elgbot stats menu. A message "Elgbot on" will appear in both. If the scoreboard looks normal. Elgbot is off. YOUR NAME: it is important if you change your name elgbot is updated. If you use console to change your name. Please type into console "name". If you change your name in any other way. Please make sure elgbot detects the change. Your name is displayed in the scoreboard and the elgbot stats menu. Make sure it is the same as your game now. When you turn elgbot off from within your game. it will not still count stats. If you turn elgbot on half way through a game. It should slowly work through the whole game thgus far counting your stats still. Each level or round. Counts as a new map and the stats should stats fresh for the in game menu. 5. Bind a key to elgbotmain (stats window) A. To do this, look in the control options. 6. Send feedback.
Elgbot 40 Beta
Elgbot Version: 4.0 23:05 05/02/2011 Presented by Elgan ----------------------------------------- ** Fixed some crashing. * Implamented playdemo and record commands. can now use the above commands to play and record demos in mohaa * new stats, rounds and things. * edited menus a bit * fixed elgbot_language cvar. now works, moved language files to elgbot folder giving ability to make new languages, server ini files * fixed first blood when joined a map * other tweaks i forget. * fixed some issues with input locking up *fixed scorebaord * fixed kills in a row This is a beta test release, MOHAA stats programme Features: ----------------------------------------- MOHAA.exe & cgamex86.dll (OPTIONAL) ----------------------------------------- If you experience trouble loading elgbot.exe Try using these files. They are origional binaries used for making the elgbot binaries. Rename your old mohaa and use this one. msvcr100.dll ----------------------------------------- This is a VC++ Runtime, if you do not have them. Place it inside your MOHAA\ directory with your mohaa.exe. You can copy / paste your moh shortcut and right click, select "properties" and alter the path. where it has mohaa.exe, change that to ELGBOT.exe. Files in the archive: ----------------------------------------- ELGBOT Readme.txt MOHAA (Directory) MOHAA.exe ELGBOT.exe msvcr100.dll ELGBOT.dll detoured.dll MAIN (Directory) cgamex86.dll elgbot.pke (main skin pk3) sounds (Directory) Installing the mod. Really just extract this archive to \MOHAA\ ----------------------------------------- 1. ELGBOT.exe, msvcr100.dll & ELGBOT.dll ) Locate your MOHAA directory. - a typical path: C:\program files\MOHAA\EA GAMES\MOHAA\ This directory should be the base directory where mohaa.exe is installed. MOHAA.exe is found here. extract msvcr100.dll, ELGBOT.exe & ELGBOT.dll & detoured.dll. To this directory. 2. ( INSTALLING: elgbot.pke ) From your MOHAA directory, found in step one. Navigate in to the "main" folder. - a typical path: C:\program files\MOHAA\EA GAMES\MOHAA\main\ In this directory, you should see pk3 files, pak0.pk3, pak1.pk3 etc Place elgbot.pke in this directory. 3. MOHAA.exe & cgamex86.dll (OPTIONAL) Optionally rename your current MOHAA.exe & cgamex86.dll to say, MOHAA_old.exe & cgamex86_old.dll and then use these in their place. 4. put sounds\ in main Uninstall: ----------------------------------------- Reverse above:
Player Skin Checker
Hi , i found my skin checker mod and thought i would update/finish it and upload here for anyone who needs one What it does it scan through a list of 'allowed' skins ( atm it includes just all stock ones ) and if a players skin is not on the list, changes their model to a random allowed one. The force of the model is only current until they respawn , or change to a allowed skin. The reason being is i didnt want to change the players settings on them, noone likes that. So instead i made it so just while their in your server, there model will be changed. Settings, are changed at the top of the script, [Required] Scantime , time between scans, default is 10 seconds, dont go lower then 5. [Optional] Turn forcemodels OFF on each player [Optional] Send a message to the player when they had their skin changed To ADD/REMOVE skins to the list of allowed ones, just add them to each array. Save as whatever you want and exec from dmprecache.scr
Purple Clan Tags
Clan Tags mod based off the older one made By DUST. /* ---------------------------------------------------------------------------------------------------------------------------------------------------------------------- Purple Clan Tags Mod v1.00 12/01/2015 Usage: Place the mod in your server Execute the following line either from dmprecache.scr or from the indiviudal map.scr ------------------------------------------------------------------------------------------------ exec global/purple_clantags.scr local.word local.origin local.angles local.scale local.model ------------------------------------------------------------------------------------------------ Parameters: local.word = The word you want to Display , ie "Purple Rocks" DEFAULT is "Purple Rocks" local.origin = Where you want it to start from [REQUIRED] local.angles = The angles you want it to go [REQUIRED] local.scale = The scale of the objects, Dont go too high DEFAULT is 2 local.model = The model you wish to use, stick to coronas or similar, DEFAULT is "fx/corona_red.tik" Example: V2 in Allie Spawn ------------------------------------------------------------------------------------------------------------------ exec global/purple_clantags.scr "Purple" ( -800.35 1567.34 111.12 ) ( 0 -90 0 ) 2 "fx/corona_red.tik" ------------------------------------------------------------------------------------------------------------------ Notes: -------------------------------------------------------------------------------- Displayed Word can included the following Characters ( will add more if needed ): A - Z All Uppercase ( no lowercase atm ) $ ( Dollar Sign ) ! ( Exclaimation Mark ) ^ ( Whatever that is Shift + 6 ) * ( Asterisks ) [ ] ( Both Square Brackets " " ( Spaces ) -------------------------------------------------------------------------------- Ok guys, the more words the more models will need to be spawned, so bear that in mind on your server. It includes a model count once each iteration is done, so each execution ALSO NOTE: Due to the way the Angles are done, using the rotate command, each letter will be spawned the then rotated, depending on your gametype and length of word, it might take alittle while for all the letters to be in their correct positions, but it does look cool as they rotate :P Credits: Mod Based off original by Dust(dustmidlands@hotmail.com) Re-done and expanded by Purple Elephant (purpleelephant1au@gmail.com) ----------------------------------------------------------------------------------------------------------------------------------------------------------------------------------------------- */
Ip Country Mod
(Reborn IS NEEDED on your server!) Here is a mod I made to show a player's Country. I think it is neat to know where everyone is from. Installation Instructions: Unzip both the .dat file and .pk3 file to main folder If you already have a custom DMPrecache.scr, add this to it... PHP Code: [quote]//REBORN EVENT REGISTERING local.result = registerev "connected" global/connectedhandler.scr //load ip->country arrays waitexec global/ip2co/arrays.scr[/quote] If you already have a 'connected' event registered, add this in the connected event .scr... PHP Code: [quote]if(local.player) { local.player.data["name"] = netname local.player local.player.data["ip"] = getip local.player local.player.data["ccode"] = 235 local.player.data["country"] = "" waitexec global/ip2co/ip2co.scr local.player.data["ip"] local.player } [/quote] Requirements: Reborn 2.5 Gamma+ Note: This may not work well with Elbot, since both mods are opening files for data, and there is a maximum of 32 files that can be opened at once. I 'think' it should be fine though. Just giving a heads up. Use this mod for other mods... Now, each player will have attached to them, local.player.data["ccode"] . With this you can see what country they are from. (country codes can be found in countries.txt of the .zip file) . Then you can take that and interpret things into other languages, such as huds and iprints, etc...
Medal of Honor: Allied Assault Mods (MOHAA) — Complete Community Archive
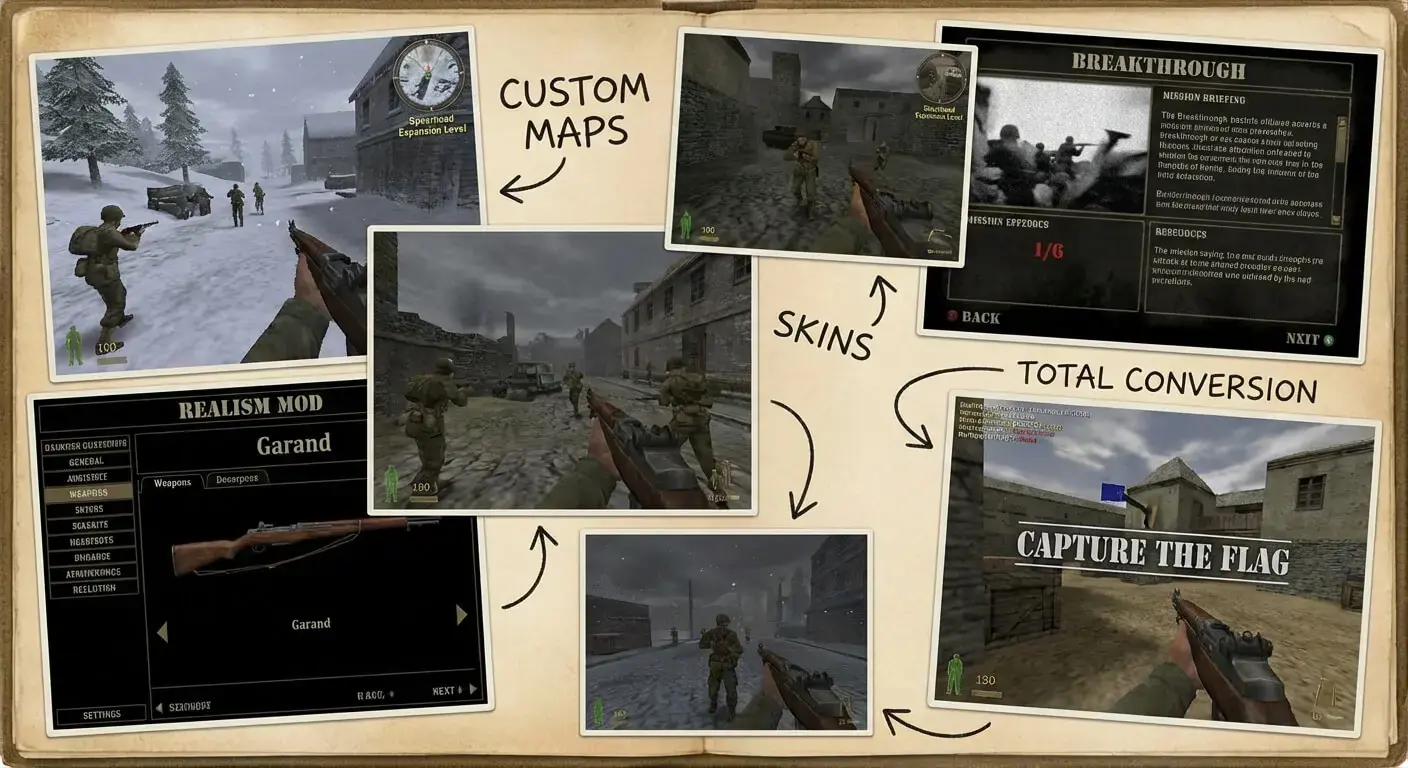
Welcome to the premier repository for Medal of Honor: Allied Assault mods. Since the game's groundbreaking release in 2002 by 2015, Inc. and EA, MOHAA has inspired one of the longest-standing modding communities in first-person shooter history. MOH-DB preserves, categorizes, and serves over 1,600 verified community modifications, custom enhancements, and competitive utilities for Allied Assault, Spearhead, and Breakthrough.
Explore MOHAA Mod Categories
Player Skins & Uniforms
Over 700 historically accurate and creative player uniforms for Allied and Axis factions. Equip authentic U.S. Army Rangers, 101st and 82nd Airborne paratroopers, British Commandos, Soviet Red Army conscripts, Wehrmacht Heer infantry, Fallschirmjäger, and Waffen-SS camouflage patterns, as well as classic community clan skins.
Weapon Models & Reskins
Enhance your WWII arsenal with ultra-detailed weapon replacements and high-resolution textures. Popular downloads include authentic wood-finish Kar98k sniper rifles, realistic metallic sheen M1 Garand models with classic "ping" animation refinements, Thompson submachine guns, MP40s, BAR 1918 rifles, and custom iron-sight alignments.
Soundpacks & Realism Audio
Transform the sonic atmosphere of Allied Assault. Replace compressed 2002 Quake-engine sound effects with cinema-grade gunfire recordings, authentic distant artillery rumblings, terrifying Stuka dive-bomber sirens, supersonic bullet cracks, metal ricochets, and remastered German and American voice callouts.
HUDs, Menus & Crosshairs
Modernize the in-game interface for 1080p, 1440p, and 4K widescreen displays. Download minimalist competitive heads-up displays, custom dot and crosshair overlays, cleaner compass indicators, redesigned main menus, and unobtrusive health and ammunition counters favored by competitive league players.
Server Utilities & Admin Scripts
Run resilient, modern multiplayer game servers with essential server-side utilities. Includes automated map rotators, anti-cheat detection tools, voting scripts, custom match timers, ping balancers, and administrative rcon managers designed for dedicated servers running 24/7.
MOHAA Reborn 1.12 Community Patch
The gold standard community patch for modern MOHAA servers and clients. The Reborn 1.12 patch resolves legacy buffer overflows, fixes client query exploits, expands internal script limits for complex mods, and provides a built-in server browser to replace the defunct GameSpy master server.
How to Install MOHAA Mods: Quick Guide
Identify Your Target Directory
MOHAA stores all game assets in subfolders inside the root installation directory:
- MOHAA (Base):
.../MOHAA/main/ - Spearhead:
.../MOHAA/mainta/ - Breakthrough:
.../MOHAA/maintt/
Paste Without Extracting
Download the mod archive from MOH-DB. If it is zipped (.zip or .rar), extract the enclosed .pk3 file. Place this .pk3 directly into your game's /main/ folder.
How to Remove or Troubleshoot
To remove any mod, simply delete its .pk3 file from the /main/ folder. The game will immediately return to stock behavior without reinstalling.
Frequently Asked Questions about MOHAA Mods
To install MOHAA mods, copy the downloaded .pk3 file directly into your Medal of Honor Allied Assault installation folder under /main/ (or /mainta/ for Spearhead, and /maintt/ for Breakthrough). You do not need to unpack or extract the .pk3 archive—the game engine loads it automatically upon launch.